Add Row
Add Element
cropper
update
update
Add Element
  • Home
  • Myrtle Beach Orthodontist Directory
  • Conway SC Orthodontist Directory
  • Murrells Inlet SC Orthodontist Directory
  • Georgetown SC Orthodontist Directory
  • Orthodontic Basics
  • Adult Orthodontics
  • Braces vs Aligners
  • What To Look For In An Orthodontist
August 21.2025
1 Minute Read

What Should I Do If I Lose My Retainer? Quick Fixes Inside

Ever wondered how fast your teeth can shift if you lose your retainer—or what to do next to protect that hard-earned, beautiful smile? You've dedicated months (maybe years) to orthodontic treatment, and now an accident threatens to undo your progress. Don’t worry! This guide dives into what you should do if you lose your retainer, practical quick fixes, and the expert steps to take to keep your teeth looking their best. Take a deep breath—we’ve got your back (and your bite).

Opening Inquiry: What Should I Do If I Lose My Retainer?

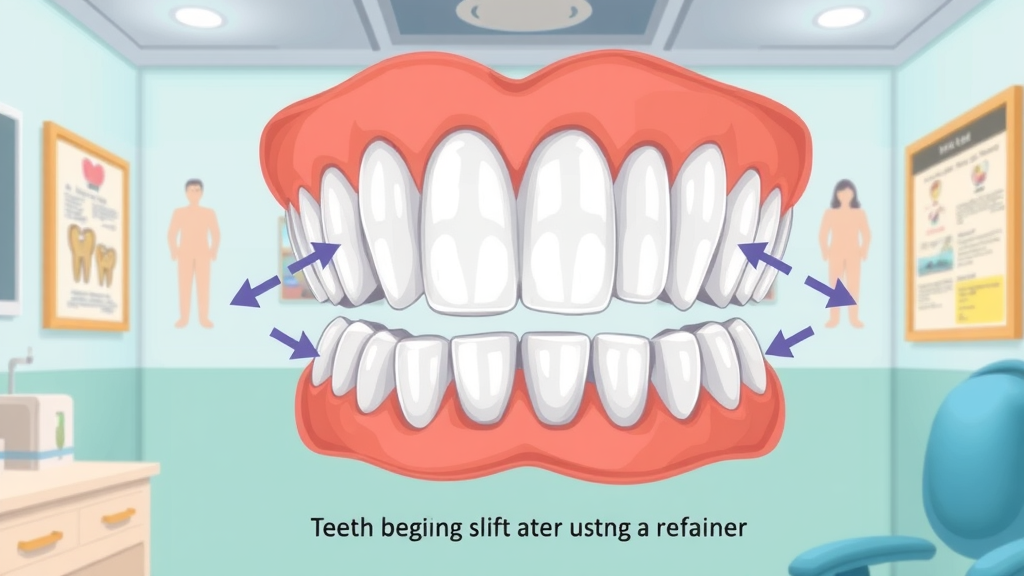
  • Have you ever wondered how quickly your teeth can begin to shift after you lose or damage your retainer?

Worried young adult searching for missing retainer case, concerned facial expression, rummaging through a tidy bedroom, modern bedroom background with orthodontic props, searching for lost retainer

What You’ll Learn in This Guide About What Should I Do If I Lose My Retainer?

  • Understanding the consequences of losing your retainer
  • Immediate steps to take if you lose your retainer
  • How to protect your orthodontic treatment
  • Contacting your orthodontist and what to expect
  • Temporary solutions for wearing your retainer
  • Cost, replacement, and emergency protocols

Lost Retainer? Here’s What to Do Immediately

  • Stay Calm and Assess the Situation
  • Retracing Your Steps: Can You Recover Your Lost Retainer?
  • Why Acting Fast Matters for Your Beautiful Smile

It’s normal to panic when you realize you’ve lost your retainer, but the first step is to stay calm. Accidents happen—even the most careful people slip up sometimes. Don’t let fear of losing your retainer flush away all your hard work. Slow down and retrace your steps: think about where you last wore your retainer, and check any places you may have left it. The most common spots are your bedside table, bathroom counter, lunchbox, backpack, or jacket pocket. If you act fast, there’s a good chance you may find your lost retainer before it gets thrown out or damaged.

However, if your retainer is truly missing or broken, acting quickly is essential. Teeth can begin to shift back to their original position in as little as a few days without consistent retainer use. This means delaying could risk undoing months or years of orthodontic progress. In these first moments, your goal should be to prevent your teeth from moving. If you find your old retainer—even an older backup—check if it still fits. While it may not be perfect, it could serve as a valuable temporary solution until you get a replacement retainer.

Orthodontic Treatment: How Losing or Damaging a Retainer Impacts Your Teeth

  • Why teeth move after losing your retainer
  • Impact on your orthodontic treatment progress
  • How long you can safely go without your retainer

After your braces or Invisalign come off, your teeth aren’t completely set—they want to move back to their original positions. Retainers act as guardians, preventing your teeth from shifting. If you lose or damage your retainer and stop wearing it, teeth can begin to shift in as short as two or three days. The longer you go without a retainer, the higher the risk that your teeth will move—sometimes back to their original place, reversing all your hard work.

This is why it’s so important to wear your retainer consistently, even if you think a few days off won’t matter. Your orthodontic treatment isn’t finished until retention is established. Missing a few days increases the risk that your beautiful smile will slowly fade, especially in the first year after your orthodontic appliances come off. Over time, gaps can reopen, your bite can change, and crowded teeth may reappear, causing both aesthetic and dental health concerns.

Illustrative diagram of teeth beginning to shift after losing a retainer, showing subtle movement and orthodontic changes, diagram in dental office

Contact Your Orthodontist After You Lose Your Retainer

  • What to say when you call about a lost or damaged retainer
  • Steps your orthodontist may take to help

Once you’ve searched thoroughly and are sure your retainer is lost or damaged, it’s time to contact your orthodontist. Be honest and specific. When you call, explain how and when you lost your retainer (or how it was damaged), and mention if you’ve tried wearing any backup retainers you have. This helps your orthodontist assess if your treatment is at risk and arrange for a replacement quickly.

Many orthodontic offices prioritize patients who have lost retainers, because acting fast can save your smile. Expect your orthodontist to schedule a visit so they can check your teeth for movement. Sometimes, your orthodontist may recommend a new mold or impression for a replacement retainer. In some cases, they may even have a backup model on file and can order a new one without seeing you in person. Either way, scheduling an appointment as soon as possible is crucial to prevent your teeth from shifting and to protect the progress of your orthodontic treatment.

What Happens if You Delay Contacting Your Orthodontist?

  • Risks of delayed action: shifting teeth and extended orthodontic treatment
  • Emergency protocols for lost retainers

If you put off contacting your orthodontist, you could face some serious consequences. When left unchecked, teeth may start to move—undoing your orthodontic journey and potentially requiring additional treatment to correct the shifting. The longer you wait, the more likely your bite and smile will regress, which means you could spend even more time and money fixing something that could have been avoided.

Most orthodontists have emergency protocols for lost retainers. If your teeth have already started to shift, they may fit you with a temporary solution or rush a replacement retainer. Delayed action can turn a simple replacement visit into something much more complicated, possibly even requiring short-term braces or aligners to restore your smile. Don’t risk it: quick action now means less hassle, less expense, and more assurance that your beautiful smile will last.

Temporary Solutions: Wearing Your Retainer (Or Not) If the Retainer is Lost

  • Short-term fixes you can try
  • Safe alternatives while awaiting a replacement

While you wait for a replacement retainer, it’s important to minimize damage and teeth movement. If you have an old retainer and it still fits, wear it! Even though it may not be a perfect fit, it’s usually better than nothing. Check it carefully for cracks before use. Clean it thoroughly before putting it back in your mouth.

If you don’t have a backup or cannot find any old retainers, avoid makeshift solutions like bending plastic or using home molds. These can do more harm than good, possibly damaging your gums or teeth. Instead, keep practicing good oral hygiene and minimize any pressure or force applied to your teeth by avoiding chewing on pens, ice, or hard foods. Stay in close contact with your orthodontist during this period—they may recommend a rush order for your replacement or offer a safe stopgap solution tailored to your needs.

Timeline for Retainer Replacement and Teeth Movement Risk
Time Without Retainer Risk of Teeth Movement Recommended Action
1-2 Days Minimal—but act immediately Search for retainer and call orthodontist
3-7 Days Moderate—teeth may shift slightly Arrange for a replacement ASAP
1-2 Weeks High risk—noticeable shifting possible Emergency appointment recommended
2+ Weeks Very high—orthodontic relapse likely Consult orthodontist and discuss further treatment options

Costs, Insurance, and Replacement Options for a Lost Retainer

  • How much does it cost to replace a lost or damaged retainer?
  • Does insurance typically cover lost retainer replacement?
  • Payment options and what to expect at your orthodontic visit

One of the biggest concerns after losing or damaging your retainer is the expense. Replacement costs typically range from $150 to $500 per retainer depending on the type (clear, wire, or custom). This may feel steep, but consider it an investment in maintaining all your hard dental work! Some insurance plans cover part of the replacement cost for removable retainers, but many do not, so check with your provider for details. Payment plans are often available, so don’t delay your appointment due to cost concerns—your orthodontist’s office can discuss options that suit your budget.

At your orthodontic visit, prepare for a quick exam to assess if your teeth have shifted. If impressions or scans are needed, the process is fast and non-invasive. In many cases, your orthodontist can use a backup digital file of your previous retainer to expedite your replacement. While paying for a new retainer might sting, acting fast will save you money in the long run by preventing the need for more orthodontic treatment.

Professional dentist explaining replacement retainer costs to a patient, showing cost charts, modern dental office setting, discussing insurance and payment for lost retainer

Can You Prevent Losing Your Retainer? Tips for Wear and Care

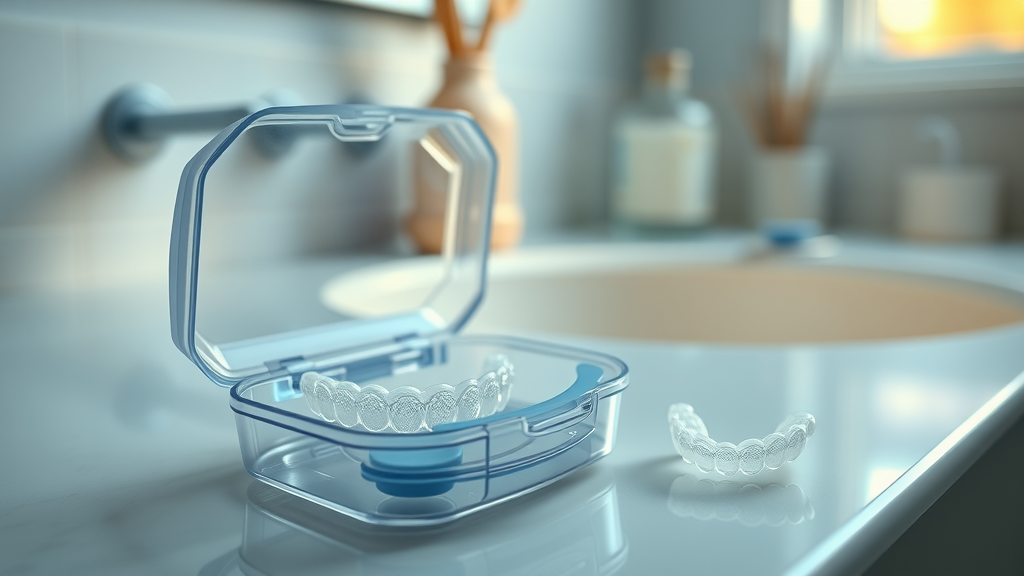
  1. Always use your retainer case: Make it a habit to put your retainer directly in a case when you’re not wearing it. Avoid wrapping it in napkins, putting it in pockets, or leaving it in random places.
  2. Keep a backup retainer if possible: Some orthodontists offer two sets. Use one for daily wear and keep the other in a safe spot as a spare.
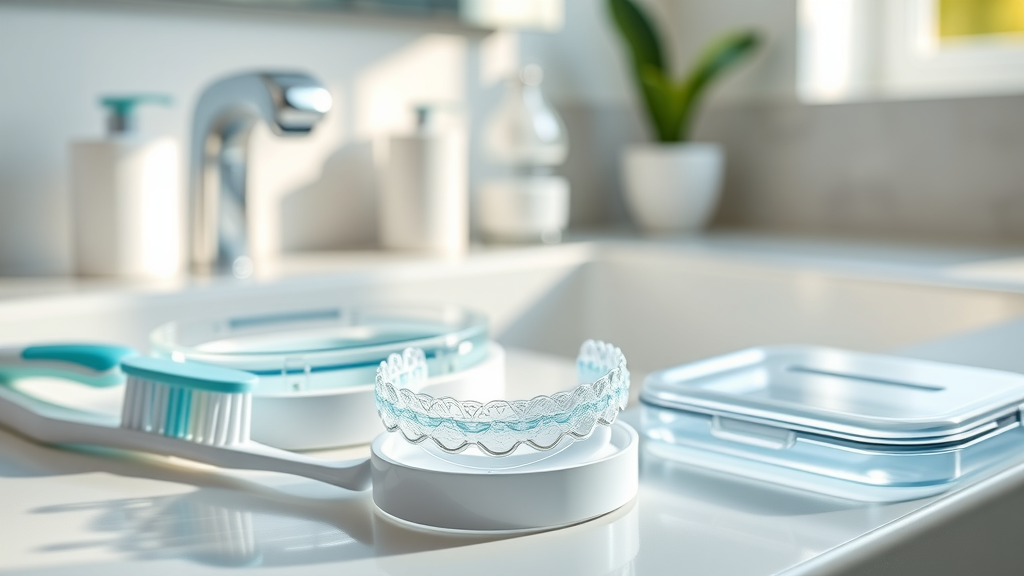
  3. Clean your retainer regularly: Clean retainers last longer and are less likely to become brittle and break.
  4. Store your retainer in a consistent place: Whether it’s your nightstand, bathroom drawer, or backpack pocket, always store your case in the same spot.
  5. Check before throwing things away: Many retainers are accidentally tossed out after being wrapped in paper towels or napkins.

By following these tips, you’ll avoid losing your retainer and keep your beautiful smile intact. Remember, prevention is easier (and cheaper) than replacement!

"Wearing your retainer as directed is the single most important thing you can do to maintain a beautiful, straight smile after orthodontic treatment." — Dr. Evans, Orthodontic Specialist

Confident young adult placing retainer in a protective case, mindful and satisfied, proper retainer care to avoid losing or damaging, home bathroom countertop

People Also Ask: What to Do If I Lost My Retainer?

  • Answer: If you've lost your retainer, stay calm, thoroughly check places where it might be, and contact your orthodontist immediately. Avoid long gaps without wearing your retainer.

People Also Ask: How Long Can I Go Without My Retainer?

  • Answer: Teeth can start to shift in as little as a few days to a week without a retainer. Immediate replacement is recommended to avoid reversing your orthodontic treatment.

Close-up of clear plastic retainers on a bathroom counter, empty retainer case, urgency for lost retainer, focus on proper retainer storage

People Also Ask: Is Losing a Retainer a Dental Emergency?

  • Answer: While not always an immediate emergency, losing your retainer is urgent. The faster you act, the less chance your teeth will shift. Call your orthodontist promptly.

People Also Ask: Do I Have to Pay if I Lose My Retainer?

  • Answer: Most orthodontic practices do charge for retainer replacements. Costs vary and insurance may partially cover the expense, so review your plan details.

FAQs: Everything Else About What Should I Do If I Lose My Retainer?

  • Can I use my old retainer if I find it?
    If your old retainer still fits and feels comfortable, you can use it as a temporary solution. If it feels tight or painful, don’t force it—call your orthodontist for guidance.
  • Should I try to fix a damaged retainer myself?
    Never attempt to fix a damaged retainer at home. DIY repairs can make the problem worse or cause injury. Contact your orthodontist for a professional opinion and replacement.
  • What if my retainer keeps breaking or getting lost?
    Speak to your orthodontist—they may recommend a different type of retainer, like a fixed one, or suggest strategies for safer storage and care.
  • How quickly do teeth start moving without a retainer?
    Teeth can start to move after just a few days without a retainer, especially in the first year post-treatment, so act fast to prevent shifting.

Key Takeaways: What Should I Do If I Lose My Retainer?

  • Act immediately if you lose your retainer
  • Contact your orthodontist as soon as possible
  • Temporary solutions exist, but a new retainer should be acquired quickly
  • Proper care prevents loss or damage

Conclusion: Protecting Your Beautiful Smile After a Lost or Damaged Retainer

  • Losing your retainer isn’t the end of your orthodontic journey, but what you do next matters. Take action, stay informed, and keep your smile healthy.

Smiling young person with straight teeth, relieved, holding a new retainer in a case, positive orthodontic office visit after losing retainer

Your Next Step: Stay Informed and Protect Your Smile

  • Your smile is worth it — and staying informed is the first step. Join hundreds of locals already following Grand Strand Smile Spotlight for updates, advice, and trusted care insights.

"Don’t let a lost retainer undo months or years of progress. Act fast, consult your orthodontist, and stay proactive."

Video explaining quick steps to take if you lose your retainer, including when to call your orthodontist, how to safely store old retainers, and practical tips for prevention.

Learn how losing your retainer can affect your orthodontic results and see tips from dental experts on keeping teeth aligned after braces or Invisalign.

Losing your retainer can be concerning, but taking prompt action is essential to maintain your orthodontic results. The article “I Lost My Retainer: What to Do and How to Stop Your Teeth From Shifting” provides comprehensive guidance on immediate steps to take, including contacting your orthodontist and considering temporary solutions to prevent teeth from shifting. (dentaly.org) Additionally, “What Should I Do If I Lose Or Damage My Retainers?” offers practical advice on handling lost or damaged retainers, emphasizing the importance of timely replacement and preventive care to safeguard your smile. (mtsmilesortho.com) If you’re serious about maintaining your orthodontic results, these resources will provide you with the necessary steps and tips to address a lost retainer effectively.

Care & Maintenance

1 Views

0 Comments

Write A Comment

*
*
Related Posts All Posts

How Long Do I Have to Wear My Retainer? Find Out Now

Have you ever wondered if there’s an “end date” to wearing your retainer— or what might really happen if you stop wearing it? The answer could mean the difference between a lifelong beautiful smile and teeth moving all over again. In this guide, we’ll unlock the real facts and expert secrets behind how long do I have to wear my retainer? and why this is the ultimate question for anyone finishing braces or Invisalign. If you want your confident, straight smile to last, this is essential reading.Curiosity Unlocked: Why Asking 'How Long Do I Have to Wear My Retainer?' MattersYour orthodontic journey doesn’t end when your braces come off or your last Invisalign tray clicks into place. Many people ask, “How long do I have to wear my retainer?”—and with good reason. Teeth have a natural tendency to shift back to their original positions, especially in the months and years following orthodontic treatment. Understanding the real answer to this question can save you frustration, time, and the disappointment of losing your straight smile. Ignoring your retainer advice can undo years of hard work, yet sticking to a good protocol can help maintain your beautiful smile for life.From teens to adults, everyone who has experienced orthodontic treatment eventually asks about the best way to keep their teeth straight after braces or aligners. This decision impacts not only your smile’s appearance but also your overall dental health. The truth? Wearing your retainer as recommended is absolutely vital to ensure your teeth stay in the positions your orthodontist worked so hard to create. Don’t let all that effort go to waste—let’s find out everything you need to know about wearing your retainer for lasting results.What You'll Learn About How Long Do I Have to Wear My Retainer?The essential reasons behind retainer wear after orthodontic treatmentDifferences between permanent and removable retainersHow fast teeth shift without wearing your retainerExpert insights on the best schedule for wearing your retainerWhat happens if you stop wearing your retainerUnderstanding Orthodontic Treatment and Post-Braces CareWhy Orthodontic Treatment Requires RetainersAfter you finish your orthodontic treatment, your teeth aren’t automatically set in their new positions. The bone and tissues supporting your teeth need time to stabilize, which is why wearing a retainer is essential. Without consistent retainer use, your teeth can shift back toward their original, pre-treatment places—undoing your hard-earned straight smile. This period is known as the “retention phase,” and it’s designed to prevent relapse, which is when teeth shift after orthodontics. Retainers help keep your teeth in place while your gums and jawbone adapt, gradually locking in that perfect alignment.Most orthodontists provide either a removable retainer (like an Essix retainer or Hawley retainer) or a permanent retainer (also called a fixed retainer) for daily or nightly wear. The type of retainer you get and how long you’ll need to wear it depends on your treatment plan, how your teeth responded, and your orthodontist’s best practices. Ultimately, the real key is consistency during this crucial transition: otherwise, teeth shifting can be rapid and discouraging.The Science Behind Teeth Shift After Braces or InvisalignWhen your braces come off or you finish your Invisalign plan, your teeth may feel secure, but they are still vulnerable to movement. The supporting bone and gum tissues require many months—sometimes over a year—to strengthen around the teeth’s new positions. Without a retainer’s steady support, your teeth will almost certainly begin to shift. This process—known as orthodontic relapse—is common and can happen quickly, especially in young people or adults whose jaws are still growing.Every smile and every bite is unique. Researchers have shown that teeth shift occurs most rapidly in the first 12 months after treatment. That’s why wearing a retainer full time (at least at first) is almost always recommended. The risk of teeth shifting lessens over the years, but it never truly disappears. Daily, night, or permanent retainer wear is like insurance for your new smile—protecting your investment and hard work for years to come.How Long Do I Have to Wear My Retainer? Key Factors ExplainedInitial Retainer Wear: Full Time vs Night OnlyThe answer to “how long do I have to wear my retainer?” is not the same for everyone, but there are some common guidelines. Most orthodontists recommend wearing your retainer full time (day and night, only taking it out for eating and cleaning) for the first 3–6 months after you finish with braces or Invisalign. This constant wear protects against initial tooth movement as your mouth settles into its new alignment. After the initial retention phase, most people can transition to wearing their retainer only at night.“Full time” means about 20–22 hours per day, and “night only” typically means at least 8–10 hours while you sleep. However, the exact amount of time depends on your unique orthodontic treatment, the type of retainer prescribed, and your orthodontist’s advice. The most important thing is to follow the schedule your provider gives you, adjusting over time only as recommended during checkups.Why Wearing Your Retainer as Directed Is CrucialIf you’re tempted to skip or “cut back” on retainer wear, remember: teeth can shift faster than you think. Even going a few days without your retainer can allow small shifts that build up over time. Neglect for weeks or months can lead your teeth back to their original, crooked positions—or even require restarting orthodontic treatment. That’s why orthodontists emphasize wearing your retainer exactly as directed, especially in the critical first year after braces or aligners.Retainer wear is not forever, but consistency is the only way to protect your new smile. Missing nights, skipping days, or only wearing your retainer “when you remember” leads to unpredictable tooth movement. Following your orthodontist’s protocol, whether it’s full-time or nighttime, is the single most powerful way to prevent regret—and keep your teeth as straight as the day your braces were removed.Types Of Retainers and How They Affect How Long You Wear Your RetainerRemovable Retainer Guidelines: Average Duration and CareRemovable retainers—like the clear Essix retainer or the classic Hawley retainer—are popular after orthodontic treatment because they’re discreet and easy to care for. For these, the typical protocol is full-time wear for 3–6 months, then switching to nights only. This schedule helps your teeth stabilize before transitioning to lifelong nighttime maintenance. The average person should expect to wear their retainer nightly for years—often for life—since teeth have a lifelong tendency to move back to their original positions.Removable retainers require special care. Clean them daily with a soft toothbrush, rinse after each use, and keep them in a protective case. If you lose or break yours, ask your orthodontist for a replacement immediately—delays can allow teeth shifting that’s difficult to correct. Proper hygiene and careful handling of your retainer are critical for lasting results and keeping bacteria at bay.Permanent Retainer: Long-Term Commitment ExplainedA permanent retainer (also called a fixed retainer) is a thin wire bonded to the inside of your front teeth, usually on the lower set. This type of retainer is “always on”—which means you won’t have to remember to wear it, and your teeth are protected 24/7. Permanent retainers are especially common for patients who had severe crowding or gaps before treatment, since their teeth are more prone to relapse.While a fixed retainer sounds like a set-it-and-forget-it solution, it comes with its own commitment to dental hygiene. You’ll need to clean around it carefully every day and schedule regular dental checkups to ensure the wire stays intact. Many patients keep their permanent retainers for 5–10 years or longer, and some never remove them unless advised by their orthodontist. Always follow your orthodontist’s protocol for the safest, best results.What Happens If You Stop Wearing Your Retainer?Teeth Shift: How Quickly Can Your Smile Change Without Your Retainer?If you stop wearing your retainer, teeth shift tends to start within days to weeks—especially in the first year after braces or aligners. The longer you go without wearing your retainer, the more likely your teeth may return toward their original positions. For most people, a break of a few days produces minor movement, but even two weeks can mean noticeable changes in alignment and how your teeth fit together. If you wait months or longer, a full orthodontic restart may become necessary.Teeth naturally want to move back to where they started before your treatment. Skipping your retainer lets the soft tissues and bone around your teeth relax and shift—causing crowding, gaps, or a bite that no longer feels comfortable. That’s why routine retainer wear is essential for maintaining a beautiful, healthy smile for years (or even life).Risks and Consequences of Not Wearing a RetainerIf you consistently skip wearing your retainer, the risks go far beyond a slightly uneven smile. You might find your teeth “don’t fit” together right, your bite changing, or even renewed discomfort that affects eating and talking. Over time, teeth shifting can become permanent, requiring a second round of orthodontic treatment to fix. This means more visits, greater expense, and prolonging the process you worked so hard to finish.Not wearing a retainer also increases your risk for chipped teeth, uneven wear, and gum issues—especially if crowding starts to cause hard-to-brush overlaps. The bottom line? A retainer is your ultimate insurance policy against orthodontic relapse. Listening to your orthodontist and consistently following their advice ensures you’ll keep your smile straight, strong, and beautiful for many years to come.Real-Life Timelines: How Long Do I Have to Wear My Retainer? (Reference Table)Treatment TypeRetainer TypeInitial WearMaintenance WearProfessional RecommendationsBracesRemovable (Essix or Hawley)Full time, 3–6 monthsNight only, indefiniteNightly wear for life for best resultsInvisalignRemovable (Essix style)Full time, 3–6 monthsNight only, indefiniteNightly wear for life for best resultsBraces or InvisalignPermanent (fixed wire)24/7 (always on)Years or lifelong, as advisedAnnual dental checkups for stabilityExpert Quotes: Orthodontists Answer 'How Long Do I Have to Wear My Retainer?'“Retainers are not forever, but commitment to regular wear is essential for lasting results.” — Dr. S. Carter, Board-Certified Orthodontist“Even minor neglect can undo years of orthodontic work. Retainers are your insurance policy for a straight smile.” — Dr. Linda Tran, DDSHow to Make Wearing Your Retainer Easier: Practical Tips & ListsCreate a retainer wear scheduleClean your retainer regularly to avoid bacteria build-upStore your removable retainer safely in its case when not in useSet phone reminders for night wearCheck fit every month and consult your orthodontist if concerns ariseDo not skip retainer nights, even when travelingReplace lost or broken retainers immediatelyOrthodontists explaining retainer wear duration, illustrated with graphics and examples.People Also Ask: How Long Do I Have to Wear My Retainer?When can I stop wearing my retainer?Answer: Most orthodontists recommend wearing your retainer full time for the first 3-6 months after braces or Invisalign, then transition to nights indefinitely, unless directed otherwise. Lifelong nighttime wear is common for best results.Can I go 2 weeks without my retainer?Answer: Missing two weeks may lead to minor to moderate teeth shifting. Always consult your orthodontist before extended breaks; never assume your teeth will stay in position.How fast do teeth shift without a retainer?Answer: Teeth can begin shifting within days to weeks of not wearing a retainer. The rate depends on age, bone density, and length of orthodontic treatment.What if I only wear my retainer at night?Answer: Nighttime wear is usually recommended after the initial full-time period, but neglecting prescribed full-time use early on can allow shifting. Follow your orthodontist's directions carefully for your treatment plan.FAQs: Your Top Questions About How Long Do I Have to Wear My Retainer? AnsweredHow do I know if my retainer still fits? If your retainer feels tight or doesn’t fit properly, your teeth may have shifted. Try to wear it right away—if you have pain or it won’t seat, call your orthodontist as soon as possible for advice or a replacement.What should I do if I’ve lost or broken my retainer? Contact your orthodontist immediately to order a new one. Delaying can lead to teeth shifting, especially in the months right after treatment. Wearing your old retainer—even if cracked—is better than nothing, but a replacement is crucial.Can I ever completely stop wearing a retainer? Most experts recommend some form of lifetime wear. While you may reduce frequency, even years after treatment, your teeth are prone to shift without occasional retainer use. Lifelong nighttime wear is the gold standard if you want to keep your straight smile.Is retainer wear different for adults versus teens? The basics are the same: everyone needs a strong retention phase followed by nighttime wear. However, adult teeth may shift slower but are still at risk, and adults often need to remain extra vigilant about lifetime maintenance.Key Takeaways: How Long Do I Have to Wear My Retainer?Retainers are essential for maintaining your orthodontic results after braces or Invisalign.Initial wear is typically full-time, then transitions to nighttime indefinitely.Teeth can move quickly without proper retainer use.Orthodontists recommend routine checkups for retainer fit and wear.Consistency with your retainer equals lasting results.Conclusion: Stay Ahead of Your Smile – Why How Long Do I Have to Wear My Retainer? Is the Ultimate Orthodontic QuestionWearing your retainer as directed is the difference between keeping your beautiful smile and letting your teeth shift. Commit to the process and enjoy the confidence of a straight smile for life.Want more expert-backed answers about braces, Invisalign, and local orthodontic care? Subscribe to Grand Strand Smile Spotlight and stay ahead of your smile journey.After completing orthodontic treatment, wearing a retainer is essential to maintain your teeth’s new alignment. The duration and schedule for retainer wear can vary based on individual circumstances, but general guidelines are as follows:Initial Phase: Full-Time WearFor the first 3 to 6 months post-treatment, it’s typically recommended to wear your retainer full-time—approximately 20 to 22 hours per day—removing it only for eating, drinking, and oral hygiene. This period allows the surrounding bone and tissues to stabilize around your teeth’s new positions. (colgate.com)Transition Phase: Nighttime WearAfter the initial phase, if your teeth have remained stable, you may transition to wearing your retainer only at night. This phase can last for several months to a few years, depending on your orthodontist’s assessment. (smilerepublicortho.com)Long-Term Maintenance: Lifelong RetentionTo prevent any potential shifting of teeth over time, many orthodontists recommend indefinite nighttime retainer wear. This could mean wearing your retainer a few nights per week for life. (clearchoiceortho.com)Factors Influencing Retainer Wear DurationSeveral factors can affect how long you’ll need to wear your retainer:Age: Younger patients may require longer retainer use due to ongoing jaw growth.Severity of Initial Misalignment: More severe cases may necessitate extended retainer wear to maintain results.Type of Retainer: Removable retainers often follow the schedule above, while fixed (permanent) retainers may be worn for several years or longer. (colgate.com)Consequences of Not Wearing Your RetainerNeglecting to wear your retainer as prescribed can lead to teeth gradually shifting back to their original positions, potentially undoing the results of your orthodontic treatment. In some cases, this may require additional orthodontic intervention. (clearchoiceortho.com)ConclusionConsistent retainer use is crucial for preserving the alignment achieved through orthodontic treatment. Always follow your orthodontist’s specific recommendations regarding retainer wear to ensure the longevity of your straightened smile.

How Should I Clean My Invisalign Aligners? Easy Tips Inside

Did you know that up to 70% of Invisalign users clean their aligners incorrectly, risking stains, odors, and bacteria? If you want to avoid cloudy trays, bad breath, or even tooth decay while wearing Invisalign, you’re not alone. Many people unknowingly neglect the best cleaning method or rely on routines that can actually damage their aligners. In this comprehensive guide, you’ll discover how should I clean my Invisalign aligners and keep them fresh, clear, and effective throughout your treatment. Did You Know Most Invisalign Users Clean Their Aligners Incorrectly? "A recent study showed that up to 70% of Invisalign users do not follow recommended cleaning methods, increasing the risk of staining and bacterial buildup." Many people assume that a quick rinse with warm water or a basic brush will keep their Invisalign trays clean. However, failing to use the proper cleaning crystals, solutions, or brushing techniques can allow food particles and bacteria to linger on your aligners. This not only leads to visible stains and bad breath but can also compromise your progress with Invisalign treatment. Understanding how should I clean my Invisalign aligners is critical—not just for maintaining clear trays, but for safeguarding your oral health and getting the best outcome from your orthodontic investment. Why Proper Invisalign Aligner Cleaning Is Essential for Oral Health Keeping your Invisalign aligners clean is about much more than appearances. Daily cleaning removes trapped food particles, reduces the risk of plaque buildup , and prevents unpleasant odors from developing. Poor oral hygiene during Invisalign treatment can contribute to problems like tooth decay or gum irritation, especially if aligners aren’t cleaned and rinsed before every use. Clean Invisalign trays play a crucial role in keeping your oral hygiene at optimal levels while you straighten your teeth. Maintain oral hygiene and fresh breath Prevent aligner discoloration and odors Protect against plaque and bacteria buildup Extend the life of your Invisalign trays By establishing the right cleaning routine for your aligners, you’ll also protect your investment in Invisalign, avoid embarrassing moments caused by cloudy or foul-smelling trays, and ensure your treatment is as quick and effective as possible. What You’ll Discover About Cleaning Invisalign Aligners This guide goes beyond the basics. You’ll learn: The best techniques for cleaning Invisalign aligners daily Which cleaning crystals and methods are most effective How to use alternative cleaning solutions safely Expert insights for keeping your aligners spotless and clear Whether you’re just starting your Invisalign journey or looking to upgrade your daily clean routine, you’ll soon know exactly how should I clean my Invisalign aligners for maximum comfort and results. Understanding Your Invisalign Aligner, Tray, and Trays: Why Cleanliness Matters What Makes Invisalign Trays Different from Other Clear Aligners? Invisalign trays are made from high-quality, medical-grade thermoplastic that’s engineered for durability, transparency, and biocompatibility. Unlike some generic clear aligners, Invisalign trays are designed to fit snugly and stay nearly invisible throughout your treatment. However, their clarity means that even small stains or films of bacteria can show up fast—making it essential to understand specific cleaning method requirements. Because the trays are worn almost all day, maintaining a clean invisalign aligner is the only way to preserve that hallmark “invisible” look while preventing bad breath or germs from growing unchecked. Compared to traditional braces, Invisalign treatment gives you the freedom to remove your aligners for eating and oral hygiene. This flexibility, though, also means you must take extra care to clean your aligner thoroughly—especially after every meal—to avoid trapping food particles that could cause tooth decay . Risks of Poor Invisalign Cleaning: Stains, Odors, and Germs Neglecting to clean your invisalign aligners can have severe consequences for both the trays and your teeth. Cloudy aligners, persistent odors, and even visible mold or bacterial colonies can result from improper cleaning, especially if you frequently skip your daily clean . Stubborn stains may form if trays are not rinsed soon after acidic or colored foods and drinks. Worse, bacteria trapped against your teeth can contribute to gum irritation or cavities, adding unnecessary dental bills to your orthodontic journey. That’s why it’s vital to follow the right routine and keep your invisalign trays clear, odor-free, and hygienic. How Should I Clean My Invisalign Aligners? Step-by-Step Methods If you’re asking “ how should I clean my Invisalign aligners ?”, follow this expert-backed step-by-step cleaning routine to keep your trays spotlessly clear and odor-free: Remove and rinse your Invisalign aligners under lukewarm water Brush gently using a soft toothbrush with unscented soap Use Invisalign cleaning crystals or cleaning crystal alternatives for a deeper clean Soak your aligners as directed by your orthodontist Rinse your aligners before each use Store in your Invisalign tray case when not in use The most important point: never use hot or boiling water as it can warp the thermoplastic, making your aligners unusable. Always brush and rinse your trays after eating and before bedtime to minimize the buildup of food particles and oral bacteria. Comparison of Common Invisalign Aligner Cleaning Methods Common Cleaning Method Frequency Supplies Needed Effectiveness Invisalign Cleaning Crystals Once daily Crystals, cup, water High Hydrogen Peroxide 1-2x weekly Peroxide, water, cup Medium White Vinegar 1-2x weekly Vinegar, water, cup Medium Mild Soap & Water Twice daily Soft brush, soap, water High Using a combination of daily clean brushing and periodic soaks in cleaning crystals or approved alternatives helps ensure your invisalign aligners remain clear and comfortable for the entire duration of your treatment plan. The Best Products and Tools: Invisalign Cleaning Crystals, Soaps, and More The market offers a variety of cleaning crystals and other solutions to help maintain your aligners. The official Invisalign cleaning crystals are easy to use, safe for your trays, and excellent at eliminating bacteria and stains. If you’re out of crystals, alternatives like hydrogen peroxide or white vinegar soaks can provide a deep clean, though they should not replace regular use of the crystals. Use mild, unscented soap when daily brushing, and always avoid harsh or scented soaps, mouthwash, and abrasive brushes, as these can damage or discolor your aligners. Invisalign cleaning crystals: pros, cons, and directions Cleaning crystals versus hydrogen peroxide and white vinegar When to use mild soap for cleaning Invisalign aligners What to avoid: scented soaps, mouthwash, harsh chemicals How to Use Invisalign Cleaning Crystals and Cleaning Crystal Alternatives To perform a deep clean, Invisalign cleaning crystals dissolve in warm water to create an effective soaking solution. This targets bacteria and prevents stains that may not budge with simple brushing. When you can’t access crystals, hydrogen peroxide diluted in water or a gentle white vinegar solution can be used as a backup, but always check with your orthodontist before trying new agents. Sodium sulfate, found in some over-the-counter cleaning tablets, is generally safe but never use harsh chemicals or bleach on your trays. Remember, regular soaking—combined with gentle brushing—ensures your invisalign tray stays invisible and healthy. Add one packet of Invisalign cleaning crystals to warm water Submerge your aligners and soak for recommended duration Rinse Invisalign aligners thoroughly before wearing Follow manufacturer directions closely for soak time, usually around 15–20 minutes. Always rinse aligners with warm water before putting them back into your mouth to remove any leftover cleaning solution. Below is a demonstration video showing step-by-step cleaning of Invisalign aligners , focusing on the correct techniques for rinsing, brushing with mild soap, and using Invisalign cleaning crystals . You'll hear expert orthodontic tips and essential cautionary advice to avoid damaging your trays. Video Demonstration: Invisalign Aligner Cleaning Steps Alternative Invisalign Cleaning Methods: Hydrogen Peroxide, White Vinegar, Distilled White Solutions If you can’t access Invisalign cleaning crystals , several alternative methods are both safe and effective with the right preparation. Diluted hydrogen peroxide solutions can be used weekly to kill bacteria, while a distilled white vinegar soak works well for removing mineral deposits. With any method, always dilute and rinse thoroughly to prevent aftertaste. Homemade cleaning solutions may not replace the effectiveness of crystals, but can serve in a pinch—especially if you’re focused on keeping aligners clean between deep cleans. Are Homemade Solutions Safe for Invisalign Cleaning? Homemade solutions, when diluted properly, are safe for occasional use on Invisalign trays . However, concentrated or undiluted solutions risk damaging the trays’ material, causing warping, cloudiness, or introducing harmful chemicals into your mouth. If you choose to use homemade cleaners, stick with mild recipes and always rinse your aligners thoroughly before wearing. Avoid coloured cleaning agents or anything containing bleach, alcohol, or abrasive substances, which will reduce the life and clarity of your Invisalign aligner. Mix equal parts hydrogen peroxide and water to soak aligners Prepare 1-part distilled white vinegar with 3 parts water for a gentle soak Rinse thoroughly to prevent aftertaste Pro Tips for Keeping Invisalign Aligner and Tray Clear and Odor-Free Brush and rinse after eating Clean Invisalign trays and aligners before bed Avoid hot water, which warps aligner shape Maintain oral hygiene for optimal results Stick to a daily clean by rinsing your trays each time you remove them. Even a quick brush with soft bristles and unscented soap makes a big difference. Flossing and brushing your teeth before reinserting aligners keeps trays from trapping food particles . And, as orthodontists note, maintaining oral hygiene is the best defense against cloudy, smelly aligners: "Daily cleaning is key. Even a quick rinse and brush can prevent 90% of aligner stains and bacteria." – Dr. Avery, Orthodontist People Also Ask: How Should I Clean My Invisalign Aligners? What's the best way to clean Invisalign aligners? Using Invisalign cleaning crystals is the most effective solution, but daily gentle brushing with mild unscented soap and lukewarm water also works well for maintaining cleanliness. How often should I clean Invisalign aligners? You should clean your Invisalign aligners thoroughly every morning and night, and rinse them after every meal or beverage other than water. What kills bacteria on Invisalign? Invisalign cleaning crystals, hydrogen peroxide, and white vinegar soaks effectively eliminate bacteria from Invisalign trays and aligners. How long do I leave my Invisalign in the cleaning crystals? Invisalign aligners should be soaked in cleaning crystals solution for 15-20 minutes, as recommended by manufacturers and orthodontists. Video Guide: Cleaning Your Invisalign Aligner at Home Watch a walkthrough of expert-approved cleaning routines, including how to brush, soak, and rinse your aligners using both official and alternative cleaning products. Following these steps keeps your Invisalign aligners comfortable and effective every day. Video Walkthrough: Invisalign Cleaning at Home Frequently Asked Questions: How Should I Clean My Invisalign Aligners? Can I use toothpaste to clean Invisalign trays? No. Toothpaste, especially whitening or abrasive types, can scratch or cloud your aligners. Stick with mild, unscented soap and approved cleaning crystals. Do I need a special Invisalign aligner brush? While a dedicated soft-bristle brush is helpful, any clean, soft toothbrush will work. Never use hard-bristled or electric brushes directly on the trays, as they can cause damage. What happens if I forget to clean my Invisalign aligners? Skipping your cleaning routine allows bacteria, food particles, and stains to accumulate, which can result in bad breath, visible cloudiness, or even dental health issues. Will mouthwash damage my Invisalign trays? Yes. Many types of mouthwash contain alcohol and dyes that can damage or discolor your aligners. Only rinse trays with water or safe cleaning solutions recommended by your orthodontist. Mistakes to Avoid: Protecting the Life of Your Invisalign Trays and Aligners Safeguard your Invisalign investment by avoiding the most common cleaning mistakes, which can shorten tray lifespan or make them less effective. Never expose your aligners to high temperatures, harsh chemicals, or abrasive cleaning methods. Never use hot or boiling water Avoid colored or scented soaps Do not use harsh toothpaste or abrasive brushes Keep Invisalign away from unapproved cleaners What to Do If Your Invisalign Trays Turn Cloudy or Smell Bad If your trays develop persistent cloudiness or odor, soak them in Invisalign cleaning crystals or a diluted hydrogen peroxide solution as soon as possible. Brush away any buildup with a soft brush and ensure your oral hygiene routine is on point. If odor or discoloration remains, consult your orthodontist for tray replacement or professional advice. Summary: Clear Steps for Clean Invisalign Aligners – Start Your Healthier Smile Today Clean Invisalign aligners routinely for clarity and hygiene Choose trusted cleaning methods and products Follow expert tips to keep Invisalign trays invisible and odor-free Take action today by upgrading your daily cleaning method—your smile will thank you! Stay Informed and Smile Bright Want more expert-backed answers about braces, Invisalign, and local orthodontic care? Subscribe to Grand Strand Smile Spotlight and stay ahead of your smile journey. To ensure your Invisalign aligners remain clean and effective, it’s essential to follow proper cleaning practices. The article “Invisalign Care Tips: Keep Your Aligners Clean and Clear” provides comprehensive guidance on daily cleaning routines, including the importance of rinsing aligners with lukewarm water and using a soft-bristled toothbrush with gentle liquid soap to prevent scratches and cloudiness. ( oxforddental.com ) Additionally, “How to Care for Your Invisalign Aligners: A Complete Guide” emphasizes the necessity of cleaning aligners at least once a day to prevent plaque buildup and maintain their clarity. ( smilearizona.net ) By incorporating these expert-recommended practices into your daily routine, you can keep your aligners fresh, clear, and effective throughout your treatment.

How Should I Clean My Invisalign Aligners? Easy Steps

"Did you know? A 2023 survey revealed that over 65% of Invisalign users experienced unsightly stains or odors in their aligners due to improper cleaning. Mastering how to clean Invisalign aligners is essential for both your smile and your health." Keeping your Invisalign trays clear isn’t just about looks – it’s crucial for oral hygiene , fresh breath, and reaching your treatment goals faster. If you’re wondering how should I clean my Invisalign aligners to prevent yellowing, odors, or bacteria, you’re in the right place. This comprehensive guide breaks down the science behind aligner care, compares top cleaning methods (including crystals, white vinegar, and hydrogen peroxide), and reveals what to do, what to avoid, and how a stellar cleaning routine ensures a healthy, radiant smile. Let’s dive in so you can wear your aligners confidently—every day! How Should I Clean My Invisalign Aligners? Proven Cleaning Methods Explained Uncover the science behind cleaning your Invisalign aligners and why regular care is crucial for oral hygiene. Discover professional strategies for keeping your Invisalign aligners, trays, and retainers spotless and clear. Understand how improper cleaning can affect your Invisalign aligners, extend treatment times, and compromise oral hygiene. The question how should I clean my Invisalign aligners comes up often among users who want clear, odor-free trays that blend in seamlessly with their daily life. Invisalign trays are made from medical-grade thermoplastic, designed for clarity—but even the highest quality plastic is no match for plaque, food particles , and daily wear unless you keep them clean. Regular cleaning (not just a quick rinse!) prevents build-up of bacteria that could otherwise cause bad breath , tooth decay, and even slow your progress by trapping stains against your teeth. Adopting the right cleaning method helps protect your aligners and your smile. Below, learn exactly how to keep your Invisalign aligners clear, odorless, and working at their best. Unlock the Benefits: What You'll Master About How to Clean Invisalign Aligners Best daily practices for cleaning Invisalign aligners Methods and products: cleaning crystals , hydrogen peroxide , white vinegar , and more Common mistakes and what to avoid Impact of oral hygiene on treatment success Fundamental Cleaning Method: Step-by-Step Instructions for How Should I Clean My Invisalign Aligners Step 1: Rinse Your Aligners Importance of rinsing Invisalign trays after removal to prevent plaque and bacteria buildup. Practical tips for when and how to rinse your aligners. Each time you remove your Invisalign tray —to eat, drink, or brush—give it a thorough rinse with lukewarm (never hot) water . This step washes away any food particles , bacteria, and plaque, preventing buildup that can cause odors and stain your aligners . Holding your removable trays under a gentle stream for several seconds ensures that even hard-to-see areas are cleansed without warping the plastic. For travel or eating out, carry a small water bottle to rinse if you’re away from a sink. Remember, immediate rinsing after every removal is a gold standard in effective Invisalign cleaning! Step 2: Daily Clean — Brushing and Gentle Cleansers Correct brushing technique for cleaning invisalign aligners. Best soft-bristled brushes and recommended unscented soap products. For your daily clean , gently brush your Invisalign aligners with a soft-bristled toothbrush and a clear, unscented antibacterial soap—never toothpaste or harsh scrubs. Use circular motions and light pressure to clean inside and out, reaching all surfaces without scratching. Scented soap should be avoided, as it can leave lingering flavors and staining on your aligner . After brushing, rinse thoroughly with lukewarm water to remove soap residue. Maintain a separate toothbrush for your aligners clean , and don’t forget to brush your teeth before reinserting the trays, protecting both your oral hygiene and your devices from bacteria transfer. Daily cleaning keeps your aligners from turning cloudy and helps combat bad breath —a common issue when food particles or bacteria collect in Invisalign aligners . Pairing this cleaning routine with diligent dental hygiene greatly reduces the risk of tooth decay during Invisalign treatment. Remember, a quick routine each morning and night is the secret to a fresher mouth and crystal-clear trays . Step 3: Soak Your Aligners for Enhanced Invisalign Clean Comparing cleaning crystal, Invisalign cleaning crystals, and natural solutions like distilled white vinegar and hydrogen peroxide. How and when to use these methods. For a deeper clean and to dissolve tough build-up or stubborn stains, soak your aligners once daily in an approved solution. The most popular options include Invisalign cleaning crystals (containing sodium sulfate), a 1:1 mix of distilled white vinegar and warm water, or a diluted hydrogen peroxide solution (equal parts with water). Choose your favorite based on your needs—crystals are specifically designed for dental appliances and are highly effective, while white vinegar and hydrogen peroxide are powerful natural alternatives that fight germs and odors. Always follow product instructions and avoid soaking for too long, especially with vinegar or peroxide, to protect your aligners from damage or aftertastes. Here’s how to do it: Dissolve a cleaning crystal packet in enough water to fully cover your trays, and soak for 15–20 minutes. For vinegar or hydrogen peroxide, soak for about 15 minutes, rinse thoroughly, and allow to air-dry before reinserting. Remember, regular soaking makes your aligners noticeably fresher and crystal clear. Comparison Table: Cleaning Crystal vs. White Vinegar vs. Hydrogen Peroxide for Invisalign Cleaning Solution Effectiveness Cost Availability Odor Cleaning Crystal High (removes stains, bacteria, and odors) Medium ($$ per box) Online/Orthodontist Neutral White Vinegar Medium-High (good for odor & stain) Low ($ per bottle) Supermarket Vinegary scent dissipates Hydrogen Peroxide High (great for tough stains/bacteria) Low ($ per bottle) Supermarket/Pharmacy Low/no odor if rinsed Step 4: Final Rinse and Oral Hygiene How oral hygiene and rinsing complement your aligner cleaning routine. Cautions against using toothpaste, mouthwash, or scented soap on Invisalign trays. After every soak, give your aligners one last, thorough rinse under lukewarm water. This removes residual cleaning solution, vinegar, or peroxide, ensuring no taste or irritation enters your mouth. Never use toothpaste (which is abrasive), colored soap, or mouthwash; these can scratch, cloud, or discolor the trays. When your Invisalign tray is clean, always brush your teeth and floss before reinserting. This holistic practice keeps both your oral hygiene and your Invisalign aligner in ideal shape, preventing bacteria from rebounding as soon as you wear the trays again. Remember, a spotless, clear aligner is a sign of great dental habits. Pair your cleaning routine with consistent brushing and fluoride toothpaste (on your teeth, not the aligners!) to minimize risks of tooth decay and ensure your Invisalign treatment yields the best possible results. Expert Tips for Cleaning Invisalign Trays and Keeping Invisalign Aligners Clear How often to clean invisalign aligners, using cleaning crystals safely, and avoiding common mistakes (hot water and harsh abrasives) Best practices for storing your invisalign tray and maintaining stain-free invisalign aligners Clean your Invisalign trays thoroughly twice a day—more often if you snack frequently or notice buildup. When using cleaning crystals , always dissolve them fully and never mix products. Avoid hot water, which can warp your aligners , and skip harsh abrasives or colored soaps that can stain or scratch the plastic. For travel or busy schedules, keep a protective case handy and store trays wet (with a touch of cleaning solution or just water) until you can rinse and clean properly—never let them dry out. When not in use, store your aligners in their case to protect from dirt, pets, or accidental drops. Regularly check for cloudiness or lingering odors—these are cues that your cleaning routine needs a boost. Following these practices ensures low-risk, low-stress invisalign cleaning and helps you maintain clear, discreet aligners from start to finish. "An ounce of prevention is worth a pound of cure — Keeping your aligners clean can shorten treatment time and improve your smile outcome." — Dr. Lauren Watson, Grand Strand Orthodontics Understanding Invisalign Cleaning Crystals: Are They Worth It? What are Invisalign cleaning crystals and how do they work? Instructions for using cleaning crystal solutions with your aligners and trays Pros, cons, and alternative products for deep Invisalign cleaning Invisalign cleaning crystals are a proprietary blend of sodium sulfate, sodium carbonate, and other gentle cleansers designed specifically for clear dental appliances. Drop a packet into a bowl of lukewarm water, dissolve, then soak your Invisalign trays for 15–20 minutes daily. These crystals powerfully remove built-up plaque, odors, and stains—without harsh chemicals or strong flavors. The main advantages are convenience and effectiveness; they’re widely recommended by orthodontists for a reason. However, they cost more than natural alternatives and must be purchased through dental suppliers or online. If you’re concerned about preservatives or additives, white vinegar or hydrogen peroxide are cost-effective alternatives, though they may require more thorough rinsing. Summary Table: Available Invisalign Cleaning Products Product Type Effectiveness Ease of Use Price Range Invisalign Cleaning Crystals Commercial (crystals) Excellent Very Easy $$ White Vinegar Natural Good Easy $ Hydrogen Peroxide Natural Excellent Easy $ Other Soaking Solutions Commercial (tablets/soaks) Good-Excellent Easy $$ Cleaning Invisalign Aligners Naturally: White Vinegar and Hydrogen Peroxide Methods How to use distilled white vinegar safely for cleaning your invisalign aligners Advantages and disadvantages of hydrogen peroxide for invisalign cleaning Scented soap, gentle cleaning, and residue-free maintenance tips If you prefer natural cleaning, distilled white vinegar works wonders for dissolving stains and neutralizing odors. Mix equal parts vinegar and lukewarm water, soak your aligners for 15 minutes, then rinse thoroughly. Vinegar is gentle, widely available, and cost-effective—but shouldn’t be overused as prolonged exposure may weaken the plastic or leave a smell if not rinsed off properly. Hydrogen peroxide is another proven solution for deep cleaning, especially if you notice built-up residue, staining, or bad breath . Dilute with equal parts water, soak your trays, and brush softly after (but don’t forget a thorough rinse). It’s highly effective, but ensure you use food-grade 3% peroxide and never ingest any remaining solution. Both methods beat using abrasive toothpaste or harsh chemicals, and each leaves your aligners refreshingly clear when combined with regular rinsing and gentle brushing. Always stick to clear, unscented soaps if you go for a quick brush rather than a soak, and double-rinse to prevent soapy aftertastes. Remember, your cleaning method should be thorough, gentle, and repeated every day for best results throughout your Invisalign treatment . People Also Ask: The Top Invisalign Cleaning Questions Answered What is the best thing to clean your Invisalign with? The best thing to clean your Invisalign aligners with is Invisalign cleaning crystals, or a gentle anti-bacterial soap with a soft toothbrush. For deeper cleans, you can soak your aligners in a mixture of water and distilled white vinegar or hydrogen peroxide for short periods. How often should I clean Invisalign aligners? You should clean invisalign aligners at least twice a day and rinse them every time you remove them. Deep cleaning with a soak or cleaning crystals is recommended at least once daily. What is the 30 minute rule for Invisalign? The 30 minute rule refers to not leaving Invisalign trays out of your mouth for more than 30 minutes. Extended periods without trays can affect treatment progress and increase the risk of bacteria and staining on your aligners. Is it better to clean Invisalign with soap or toothpaste? Soap (preferably unscented and gentle) is safer for cleaning your invisalign aligners than toothpaste, which can be abrasive and cause scratches leading to cloudiness and trapping bacteria. Major Mistakes to Avoid: Protecting Your Invisalign Aligners and Oral Hygiene Why using toothpaste or harsh chemicals can ruin invisalign trays Avoiding colored or scented soap, and what happens if invisalign aligners dry out or are not cleaned properly Tips to maximize aligner life and maintain optimal oral hygiene throughout treatment Toothpaste might seem like a logical cleaning tool, but it’s actually too abrasive for Invisalign trays . Scratches on the surface make them cloudy and create crevices for bacteria to flourish, potentially leading to bad breath and higher risk of tooth decay . Similarly, products containing harsh chemicals, mouthwash with alcohol or color, and scented soap are not suitable—they can not only cause staining and off flavors, but also compromise the structural integrity of your invisalign aligner . Never allow your aligners to dry out: when left exposed to air, they can accumulate dust and bacteria, and may even become brittle or discolored. Always rinse after removal and store in a case moistened by a little water or a cleaning solution. Failing to keep your Invisalign tray clean impacts aligner life, prolongs treatment, and can seriously affect your oral hygiene . With the right approach, you'll keep your smile healthy throughout your Invisalign journey. To get the most from your aligners, adopt a cleaning schedule, stick to approved products, rinse often, and prioritize oral hygiene. Avoid shortcuts—proper care ensures invisible, odorless trays and maximizes both health and treatment results. Quick Reference: Cleaning Schedule for Invisalign Aligners and Trays Morning & evening: Rinse and brush invisalign aligners with gentle soap Once per day: Soak in cleaning crystal solution or white vinegar As needed: Rinse after meals or snacks and before reinsertion Printable Invisalign Cleaning Schedule — Track your cleaning routines for optimal oral hygiene Time of Day Cleaning Task Product/Method Notes Morning Rinse & brush Gentle, unscented soap Soft toothbrush Don’t use toothpaste Lunch/After Meals Rinse thoroughly Lukewarm water Store in case if not reinserting Evening Deep soak Cleaning crystals/ White vinegar/ Hydrogen peroxide Follow with thorough rinse Bedtime Rinse & brush again Gentle soap, water Brush teeth before reinserting trays FAQs on How Should I Clean My Invisalign Aligners and Invisalign Cleaning Crystals Can I use regular denture cleaners for Invisalign aligners? It's best to use products specifically designed for clear aligners; many denture cleaners contain ingredients that can discolor or weaken Invisalign trays. Stick to cleaning crystals or the recommended natural soaks. Are cleaning crystals safe for daily use on aligners and retainers? Yes, cleaning crystals are formulated for regular use and are safe when used as directed. Avoid using more than instructed or mixing with other chemicals. How can I remove persistent stains from Invisalign trays? For stubborn stains, soak your aligners in hydrogen peroxide or white vinegar solution and brush gently with a soft brush. Consistency with daily cleaning prevents most stains from forming. What should I do if my aligners start to smell or taste bad? If you notice odors, increase the frequency of your cleaning routine, soak in crystals or natural solutions, and ensure you are rinsing thoroughly after each meal or snack before reinsertion. Essential Takeaways: How Should I Clean My Invisalign Aligners? Stick to daily maintenance and deep cleaning routines Choose the right products: cleaning crystals, gentle soap, white vinegar Avoid harsh chemicals, hot water, and colored substances Proper care ensures a beautiful smile and healthier oral hygiene For a Cleaner, Healthier Smile: Stay Informed and Improve Your Invisalign Experience Subscribe now to get the latest Grand Strand orthodontic guides, tips, and updates — right to your inbox. No spam. Just smiles. Maintaining the cleanliness of your Invisalign aligners is crucial for both oral hygiene and the effectiveness of your treatment. To ensure your aligners remain clear and free from bacteria, it’s essential to follow a consistent cleaning routine. Daily Cleaning Routine: Rinse Upon Removal: Each time you remove your aligners, rinse them under lukewarm water to eliminate saliva and debris. Avoid using hot water, as it can warp the plastic. ( oliveorthodontics.com ) Gentle Brushing: Use a soft-bristled toothbrush dedicated to your aligners. Apply a small amount of clear, unscented antibacterial soap and gently brush all surfaces. Refrain from using toothpaste, which can be abrasive and cause scratches. ( healthline.com ) Daily Soaking: For a deeper clean, soak your aligners daily in a solution like Invisalign Cleaning Crystals or a mixture of equal parts white vinegar and warm water for 15–20 minutes. This helps remove stubborn buildup and bacteria. ( oliveorthodontics.com ) Rinse Before Reinsertion: After soaking, rinse your aligners thoroughly with lukewarm water to remove any residual cleaning solution. Additional Tips: Avoid Eating or Drinking with Aligners: Except for water, remove your aligners before consuming food or beverages to prevent staining and damage. ( oliveorthodontics.com ) Proper Storage: When not in use, store your aligners in their protective case to shield them from bacteria and potential damage. ( paloaltoorthodontics.com ) Maintain Oral Hygiene: Brush and floss your teeth before reinserting your aligners to prevent trapping food particles and bacteria. ( healthline.com ) By adhering to these practices, you can keep your Invisalign aligners clean, clear, and effective throughout your treatment.

Terms of Service

Privacy Policy

Core Modal Title

Sorry, no results found

You Might Find These Articles Interesting

T
Please Check Your Email
We Will Be Following Up Shortly
*
*
*