Add Row
Add Element
cropper
update
update
Add Element
  • Home
  • Myrtle Beach Orthodontist Directory
  • Conway SC Orthodontist Directory
  • Murrells Inlet SC Orthodontist Directory
  • Georgetown SC Orthodontist Directory
  • Orthodontic Basics
  • Adult Orthodontics
  • Braces vs Aligners
  • What To Look For In An Orthodontist
July 30.2025
1 Minute Read

How Do I Brush and Floss with Braces? Easy Tips Inside!

"According to the American Association of Orthodontists, people with braces are twice as likely to experience plaque buildup if they do not adapt their brushing and flossing routine."

Mastering How Do I Brush and Floss with Braces? — Effective Steps for Oral Hygiene

  • In this guide, discover key strategies to answer 'how do I brush and floss with braces?' — elevating your oral hygiene and avoiding common mistakes that impact your smile.

teenager demonstrating how to brush your teeth with braces, showing a toothbrush angled at orthodontic brackets in a bright bathroom

Key Takeaways: Brushing and Flossing with Braces Explained

  • Why oral hygiene matters most for teeth with braces
  • The right way to brush your teeth and floss with braces
  • Top products to enhance brushing and flossing
  • Solutions to common brushing and flossing problems with braces
  • Answers to essential questions about oral hygiene with braces

Understanding Oral Hygiene Challenges: Brushing and Flossing with Braces

What is different about brushing your teeth and flossing with braces?

  • How brackets and wires increase food and plaque retention
  • Risks of gum disease from improper oral hygiene
  • Why a specialized brushing and flossing routine is essential

illustration of dental braces showing plaque buildup and food particles trapped around brackets and wires, highlighting the oral hygiene challenges with braces

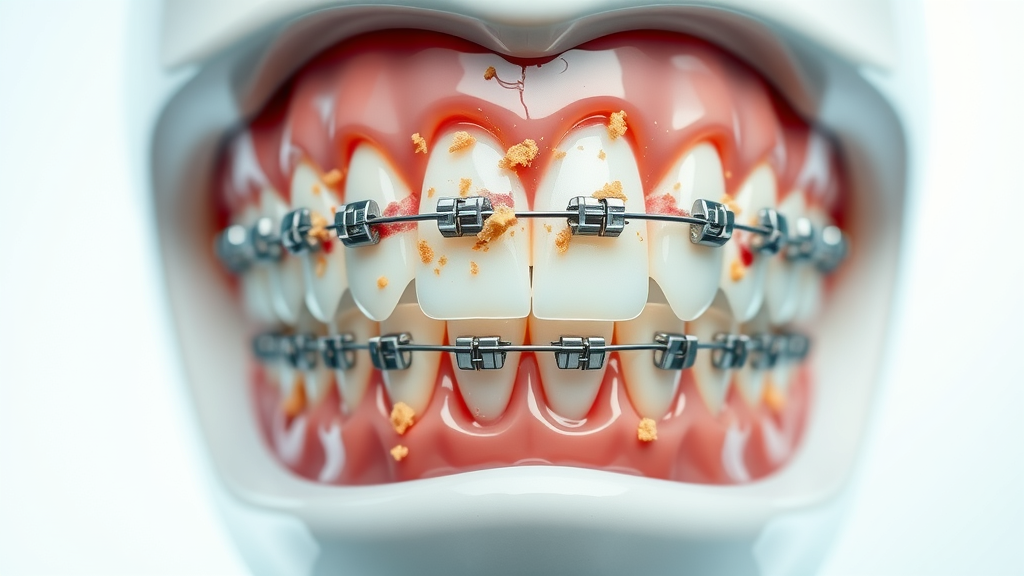
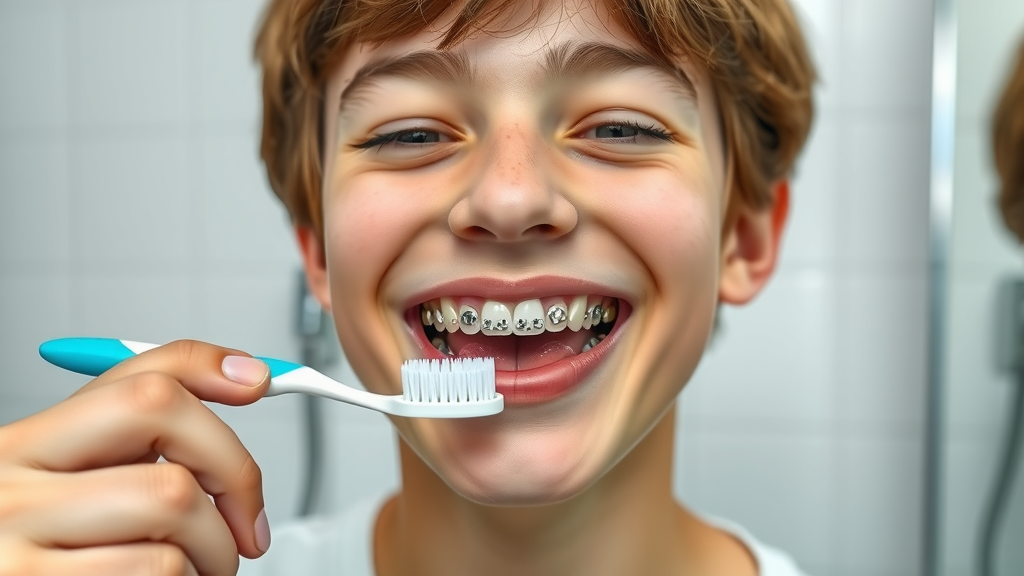
Brushing and flossing with braces is not the same as brushing your teeth without orthodontic appliances. When you have braces, the wires and brackets create more nooks and crannies for food particles and plaque to hide. This makes it much easier for plaque and food to accumulate around your brackets and wires. If you don’t adapt your oral hygiene routine, this buildup can cause more than just bad breath ; it increases your risk of gum disease , white spot lesions (small white marks where minerals have been lost from your teeth), and tooth decay . That’s why developing a specialized brushing and flossing routine is absolutely essential for good oral hygiene during orthodontic treatment.

Traditional toothbrushes and standard dental floss often don’t do enough to remove all the debris, especially from hard-to-reach areas. Brackets and wires catch more debris than plain teeth, making you more prone to oral health problems if you don’t adapt. Specialized tools, like a floss threader , dental tape , or an electric toothbrush , can help remove stubborn particles and keep your teeth with braces cleaner.

It’s easy to overlook critical areas like the gum line or the spaces between brackets. Despite these challenges, following a consistent and detailed routine makes a big difference. With the right techniques and products, you’ll minimize plaque buildup and keep your smile on track throughout your orthodontic journey.

How to Brush Your Teeth with Braces: A Step-By-Step Oral Hygiene Guide

Step 1: Selecting the Best Toothbrush for Teeth with Braces

  • Manual vs. electric toothbrush: which is better for brushing your teeth with braces?
  • How soft-bristled options benefit oral hygiene

side-by-side comparison of manual toothbrush and electric toothbrush for cleaning teeth with braces, displayed on a clean bathroom surface

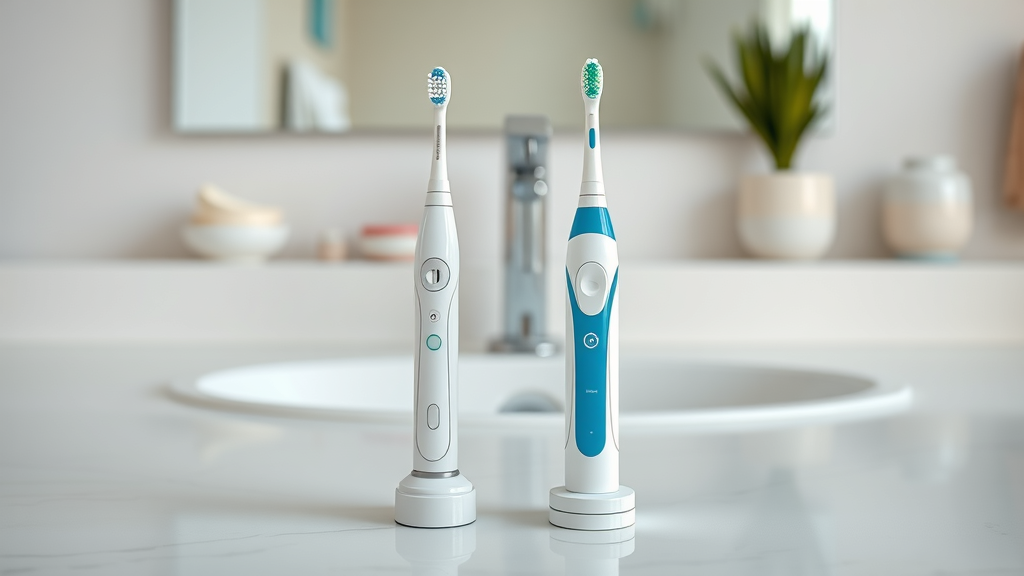
Whether you use a manual or electric toothbrush , the most important factor is using a soft-bristled brush. Soft bristles are gentle enough to protect your teeth and gums from irritation but strong enough to sweep away plaque around wires and brackets . Many people with braces find that an electric toothbrush provides extra power, making it easier to clean awkward spots. An electric toothbrush with a small head can reach around bands, brackets, and the gum line better than traditional brushes.

However, a quality manual toothbrush can also be effective if you’re diligent. Look for brushes labeled as “orthodontic” or with V-shaped bristles, specifically designed for teeth with braces . Make sure to replace your toothbrush or electric toothbrush head every three months, or sooner if the bristles become frayed.

No matter your choice, consistency is key. Brush at least twice daily. If you can, brush after every meal to keep food particles and plaque from building up in tough spots.

Step 2: Brushing Your Teeth Properly Around Braces

  • Angle your toothbrush at 45 degrees
  • Focus on cleaning around wires and brackets
  • Recommended brushing technique for top oral hygiene

To get the best results, always start by rinsing your mouth with water. Use your brush at a 45-degree angle to both the gums and the brackets. This allows the bristles to reach under the wires and around brackets , dislodging debris where it tends to collect. Make gentle circular motions , taking time to go over every tooth’s surface: the fronts, backs, and chewing sides.

Don’t forget to focus on the gum line —this is where plaque and food particles often linger and cause gum disease or white spot lesions. Carefully work the brush around each bracket and between wires, spending at least two minutes brushing your teeth per session. If you need to, divide your mouth into quadrants and give each section 30 seconds.

Using a fluoride toothpaste is also important in strengthening tooth enamel and preventing tooth decay . After brushing, rinse thoroughly and look for any remaining debris. Repeat this process after every meal, or at least twice per day, for good oral hygiene while wearing braces.

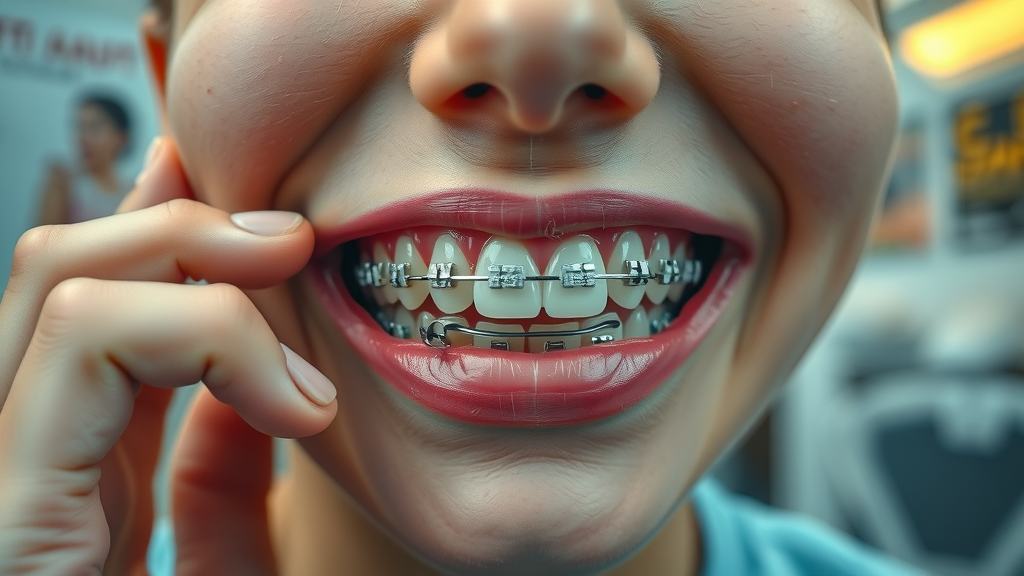
How to Floss with Braces: Best Approaches to Flossing with Braces

Choosing Traditional Floss, Dental Tape, or a Floss Threader

  • Comparison of traditional floss, dental tape, and floss threaders for braces
  • Advantages and disadvantages for oral hygiene

hands demonstrating how to use a floss threader to floss with braces, emphasizing threading floss under the archwire in a clean background

Flossing with braces can feel tricky at first, but with the right tools, it becomes manageable—and essential. Traditional floss works, but navigating the wires can be a challenge. That’s where dental tape and a floss threader come in. Dental tape is wider and more slippery than standard floss, allowing you to slide between tight spaces without shredding. A floss threader acts like a needle, making it easier to get floss underneath orthodontic wires so you can clean around your teeth and braces .

Each tool has its advantages. Dental tape is gentle on sensitive gums and strong against breakage. Floss threaders make flossing with braces fast and precise, while some people prefer special orthodontic floss that has a stiffened end, allowing you to guide it under wires without needing a separate threader. Try a few options to see which works best in your daily oral care routine.

Remember, flossing with braces takes extra time compared to regular flossing, but it is vital for preventing gum disease , cavities , and white spot lesions. Don’t skip—finding the right product can make flossing much easier and help maintain your oral health .

Step-by-Step Guide: Flossing with Braces

  • Inserting floss with a floss threader
  • How dental tape slides between tight spaces
  • Tips for flossing under wires to improve oral hygiene

Start by taking approximately 18 inches of dental floss or dental tape and threading it through a floss threader . Gently guide the threader under the main wire of your braces, then pull the floss through. Once the floss is under the wire, move it up and down gently along the side of both teeth, curving it around the gum line for a thorough clean. Avoid “sawing” motions, as these can injure gums.

Dental tape can make this process more comfortable, especially if your gums are sensitive. Its wider surface area effectively removes more plaque between teeth. Repeat this process for each tooth, using a clean section of floss every time.

Interdental brushes and water flossers are excellent supplementary tools, but never substitute for traditional flossing entirely. They help dislodge debris between brackets and wires, ensuring complete oral hygiene . By incorporating these steps, you’ll keep your teeth clean and support healthy gums during your entire orthodontic treatment.

Oral Hygiene Tools and Products That Help Brush and Floss with Braces

Comparison of Recommended Oral Hygiene Tools for Braces
Tool Main Benefit Best For
Manual Toothbrush Gentle, affordable, precise cleaning Daily brushing around brackets & wires
Electric Toothbrush Enhanced cleaning with less effort Deep clean in hard-to-reach areas
Floss Threader Guides floss under orthodontic wire Essential for flossing with braces
Dental Tape Gentle, broad floss for sensitive gums Flossing tight or sensitive spots
Interdental Brush Cleans between brackets and teeth Supplement to regular flossing
Water Flosser Uses water jets to remove plaque Quick cleanup, braces-friendly

How to Use an Electric Toothbrush or Water Flosser for Oral Hygiene

  • Benefits of adding an electric toothbrush to your routine
  • Using a water flosser to supplement traditional flossing with braces

young adult using a water flosser to clean braces at the sink, showing proper oral hygiene technique with water droplets and visible orthodontic archwire

An electric toothbrush makes maintaining oral hygiene easier and more efficient. Its rapid, consistent motions help remove plaque and food particles from around brackets, while minimizing pressure on sensitive spots. Many models have timers to ensure you brush for the recommended two minutes.

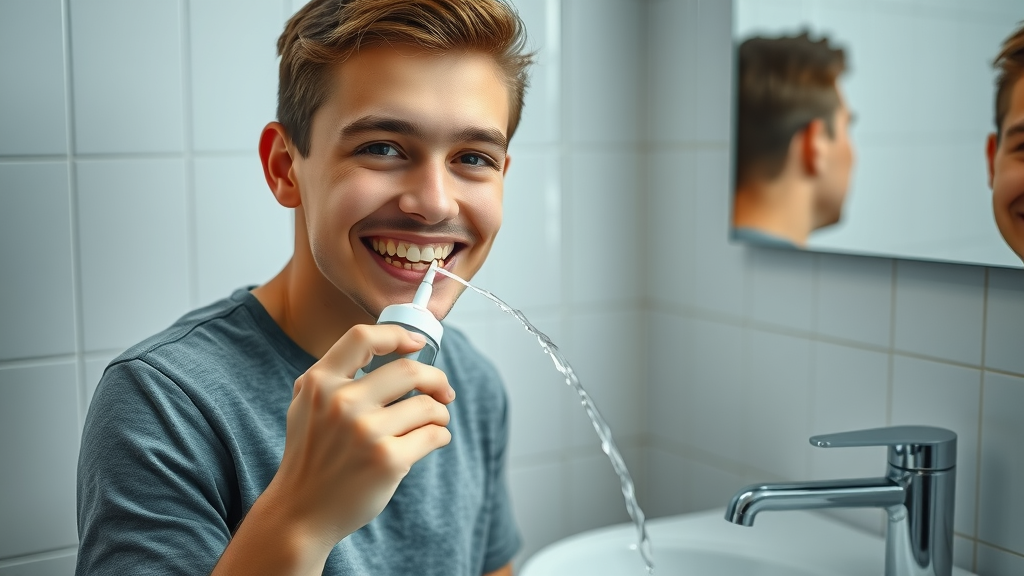
A water flosser is another powerful addition to your cleaning routine. It shoots a stream of water between teeth and braces , helping to blast out debris from places regular floss can’t reach. While a water flosser should not completely replace traditional dental floss or dental tape, it’s particularly helpful if you have difficulty using floss or have sensitive gums.

For best results, use your water flosser after brushing and traditional flossing. Direct the jet at the gum line , as well as around the brackets and wires. Add a water flosser to your daily schedule, especially at night, to leave your mouth feeling ultra clean.

Preventing Gum Disease: Maintaining Oral Hygiene with Braces

  • Why gum disease risks increase with braces
  • Tips to avoid inflammation and maintain optimal oral hygiene

Braces make it easier for plaque to gather along the gum line , which can quickly lead to gum disease (gingivitis) if not managed well. Early signs include redness, swelling, and bleeding, especially during brushing or flossing. Over time, untreated gum disease can advance, putting both your oral health and orthodontic treatment success at risk.

To avoid these problems, focus on cleaning every surface of every tooth, especially close to the gums and around each bracket. Incorporate fluoride toothpaste to protect against tooth decay . If your gums feel sore, consider using a mouth rinse designed to improve oral hygiene and reduce inflammation.

Make flossing a non-negotiable part of your routine—using a floss threader or dental tape will help make flossing easier and more consistent. Keep regular dental appointments for professional cleanings and guidance tailored to your needs.

Avoiding Mistakes: Common Oral Hygiene Errors When Brushing and Flossing with Braces

  • Not spending enough time brushing and flossing each day
  • Missing key areas around brackets and wires
  • Skipping flossing because it feels too difficult

One major mistake is rushing through brushing and flossing sessions. It’s easy to miss hidden food particles around braces when you’re in a hurry. Skipping key areas, like the sides of brackets or behind wires, can cause white spot lesions and increase cavity risk.

Another common error is not flossing at all because it initially seems too difficult or time-consuming. With products like a floss threader or orthodontic floss , you can make flossing with braces manageable and effective.

Remember: if you do not thoroughly brush your teeth and floss each day, you risk tooth discoloration, gum disease , and even delays in your orthodontic progress. Patience and regular practice turn good oral hygiene into a simple daily habit.

Brushing and Flossing with Braces: Creating a Day-to-Day Routine

teenager tracking brushing and flossing habits with a colorful chart, smiling and motivated in a cheerful study room environment
  • Setting reminders for twice-daily brushing and daily flossing
  • Incorporating oral hygiene into your morning and evening habits

Consistency is everything in maintaining good oral health with braces. Set a routine that fits with your lifestyle—a morning and evening schedule can help you remember to brush your teeth and floss every day. Using charts, phone reminders, or notes on your bathroom mirror can motivate you and help track your efforts.

Incorporate oral hygiene into your other daily habits, like washing your face or laying out your clothes. By connecting oral care to your regular routines, you’re less likely to forget or neglect important steps. Celebrate milestones (like a “streak” of flossing every day for a month), and reward yourself for reaching your goals.

Keeping a regular routine builds healthy habits that will serve you long after your braces come off, ensuring you’ll be proud to show off your beautiful new smile!

People Also Ask: Answers to Your Brushing and Flossing with Braces Questions

How to brush and floss with braces on?

  • Use a soft-bristled or electric toothbrush at a 45-degree angle
  • Brush around all parts of your brackets and wires
  • Floss with a floss threader or dental tape to reach under wires

Brushing and flossing with braces on requires some extra attention. Start with a soft-bristled or electric toothbrush , and angle it at 45 degrees toward your gum line and brackets. Take care to brush around each bracket, along the gum line, and the tops and bottoms of your teeth. For flossing, use a floss threader or dental tape to help you reach under the orthodontic wires. This way, you can remove plaque from between your teeth and braces, and keep your mouth healthy.

How often should I brush and floss with braces?

  • Brush your teeth after every meal and before bed
  • Floss at least once daily for optimal oral hygiene

For best results, brush your teeth after every meal and before bed. Brushing this often ensures that food particles and plaque don’t stick around long enough to cause oral health problems. Floss at least once a day—ideally at night—so your teeth can stay clean overnight and you minimize your risk of gum disease and cavities.

How do you brush when you have braces?

  • Start by rinsing your mouth with water to loosen particles
  • Use gentle circular motions over and around brackets
  • Carefully clean along the gum line and chewing surfaces

When you have braces, start by rinsing your mouth to get rid of loose food debris. Use your toothbrush in gentle, circular motions —not just back and forth—on the outer, inner, and chewing surfaces of your teeth. Pay special attention to cleaning around the brackets and along the gum line , areas likely to collect plaque.

Is it normal to not be able to floss with braces?

  • It’s common to find flossing with braces challenging, but floss threaders and dental tape can make it easier
  • Never skip flossing — maintaining oral hygiene with braces prevents gum disease

Many people find flossing with braces difficult at first due to the wires blocking traditional floss. Tools like floss threaders and dental tape are designed to make flossing with braces easier. It might take extra time in the beginning, but stick with it—flossing protects you against gum disease and keeps your smile healthy throughout orthodontic treatment.

FAQ: Brushing, Flossing, and Oral Hygiene with Braces

  • Can a water flosser replace traditional floss with braces? — Water flossers are very effective at dislodging food debris and helping clean between brackets, but they should supplement—not fully replace—traditional flossing with braces for best oral hygiene.
  • How long should I spend brushing and flossing with braces? — Aim for at least two minutes of brushing and five to ten minutes for flossing—especially when getting used to the routine with braces.
  • Which toothpaste is best for teeth with braces? — Look for a fluoride toothpaste, which helps protect tooth enamel and prevent tooth decay during orthodontic treatment.
  • Do I need to see my dentist more frequently while I have braces? — Yes, regular dental checkups are vital for professional cleanings and to monitor for signs of decay or gum problems while wearing braces.

Expert Advice: Quotes About Brushing and Flossing with Braces

"The foundation of a beautiful smile is great oral hygiene during orthodontic treatment." – Dr. A. Smith, Orthodontist

Stay Motivated: Healthy Oral Hygiene Habits with Braces

  • Track your progress with a brushing and flossing chart
  • Reward yourself for consistency
  • Remain focused on your long-term smile goals

Staying consistent with your brushing and flossing habits is crucial for your oral health . Use a chart or habit tracker to remind yourself and see your progress build. Set small rewards when you reach milestones (like a movie night, or special treat with your orthodontist’s approval). With routine and motivation, you’ll be smiling your brightest.

Ready for Your Best Smile? Connect with Grand Strand Smile Spotlight

  • Your smile is worth it — and staying informed is the first step. Join hundreds of locals already following Grand Strand Smile Spotlight for updates, advice, and trusted care insights.

Take Action: Make brushing and flossing with braces a simple, effective daily part of your routine, and follow Grand Strand Smile Spotlight for more tips and support! Your healthy, confident smile is within reach.

Maintaining optimal oral hygiene with braces can be challenging, but utilizing the right tools and techniques can make the process more effective. The article “How to Brush Your Teeth and Floss With Braces” by Oral-B provides a comprehensive guide on proper brushing and flossing methods tailored for individuals with braces. It emphasizes the importance of using a soft-bristled or electric toothbrush and offers step-by-step instructions to ensure thorough cleaning around brackets and wires. ( oralb.com )

Additionally, “Brushing & Flossing with Braces” by Premier Orthodontics highlights the significance of special tools like interdental brushes and oral irrigators. These devices assist in cleaning hard-to-reach areas, ensuring that food particles and plaque are effectively removed from around orthodontic appliances. ( premierorthodontics.com )

By incorporating these expert recommendations into your daily routine, you can maintain excellent oral hygiene throughout your orthodontic treatment, leading to a healthier and more confident smile.

Care & Maintenance

10 Views

0 Comments

Write A Comment

*
*
Related Posts All Posts
08.15.2025

How Should I Clean My Invisalign Aligners? Easy Tips Inside

Did you know that up to 70% of Invisalign users clean their aligners incorrectly, risking stains, odors, and bacteria? If you want to avoid cloudy trays, bad breath, or even tooth decay while wearing Invisalign, you’re not alone. Many people unknowingly neglect the best cleaning method or rely on routines that can actually damage their aligners. In this comprehensive guide, you’ll discover how should I clean my Invisalign aligners and keep them fresh, clear, and effective throughout your treatment. Did You Know Most Invisalign Users Clean Their Aligners Incorrectly? "A recent study showed that up to 70% of Invisalign users do not follow recommended cleaning methods, increasing the risk of staining and bacterial buildup." Many people assume that a quick rinse with warm water or a basic brush will keep their Invisalign trays clean. However, failing to use the proper cleaning crystals, solutions, or brushing techniques can allow food particles and bacteria to linger on your aligners. This not only leads to visible stains and bad breath but can also compromise your progress with Invisalign treatment. Understanding how should I clean my Invisalign aligners is critical—not just for maintaining clear trays, but for safeguarding your oral health and getting the best outcome from your orthodontic investment. Why Proper Invisalign Aligner Cleaning Is Essential for Oral Health Keeping your Invisalign aligners clean is about much more than appearances. Daily cleaning removes trapped food particles, reduces the risk of plaque buildup , and prevents unpleasant odors from developing. Poor oral hygiene during Invisalign treatment can contribute to problems like tooth decay or gum irritation, especially if aligners aren’t cleaned and rinsed before every use. Clean Invisalign trays play a crucial role in keeping your oral hygiene at optimal levels while you straighten your teeth. Maintain oral hygiene and fresh breath Prevent aligner discoloration and odors Protect against plaque and bacteria buildup Extend the life of your Invisalign trays By establishing the right cleaning routine for your aligners, you’ll also protect your investment in Invisalign, avoid embarrassing moments caused by cloudy or foul-smelling trays, and ensure your treatment is as quick and effective as possible. What You’ll Discover About Cleaning Invisalign Aligners This guide goes beyond the basics. You’ll learn: The best techniques for cleaning Invisalign aligners daily Which cleaning crystals and methods are most effective How to use alternative cleaning solutions safely Expert insights for keeping your aligners spotless and clear Whether you’re just starting your Invisalign journey or looking to upgrade your daily clean routine, you’ll soon know exactly how should I clean my Invisalign aligners for maximum comfort and results. Understanding Your Invisalign Aligner, Tray, and Trays: Why Cleanliness Matters What Makes Invisalign Trays Different from Other Clear Aligners? Invisalign trays are made from high-quality, medical-grade thermoplastic that’s engineered for durability, transparency, and biocompatibility. Unlike some generic clear aligners, Invisalign trays are designed to fit snugly and stay nearly invisible throughout your treatment. However, their clarity means that even small stains or films of bacteria can show up fast—making it essential to understand specific cleaning method requirements. Because the trays are worn almost all day, maintaining a clean invisalign aligner is the only way to preserve that hallmark “invisible” look while preventing bad breath or germs from growing unchecked. Compared to traditional braces, Invisalign treatment gives you the freedom to remove your aligners for eating and oral hygiene. This flexibility, though, also means you must take extra care to clean your aligner thoroughly—especially after every meal—to avoid trapping food particles that could cause tooth decay . Risks of Poor Invisalign Cleaning: Stains, Odors, and Germs Neglecting to clean your invisalign aligners can have severe consequences for both the trays and your teeth. Cloudy aligners, persistent odors, and even visible mold or bacterial colonies can result from improper cleaning, especially if you frequently skip your daily clean . Stubborn stains may form if trays are not rinsed soon after acidic or colored foods and drinks. Worse, bacteria trapped against your teeth can contribute to gum irritation or cavities, adding unnecessary dental bills to your orthodontic journey. That’s why it’s vital to follow the right routine and keep your invisalign trays clear, odor-free, and hygienic. How Should I Clean My Invisalign Aligners? Step-by-Step Methods If you’re asking “ how should I clean my Invisalign aligners ?”, follow this expert-backed step-by-step cleaning routine to keep your trays spotlessly clear and odor-free: Remove and rinse your Invisalign aligners under lukewarm water Brush gently using a soft toothbrush with unscented soap Use Invisalign cleaning crystals or cleaning crystal alternatives for a deeper clean Soak your aligners as directed by your orthodontist Rinse your aligners before each use Store in your Invisalign tray case when not in use The most important point: never use hot or boiling water as it can warp the thermoplastic, making your aligners unusable. Always brush and rinse your trays after eating and before bedtime to minimize the buildup of food particles and oral bacteria. Comparison of Common Invisalign Aligner Cleaning Methods Common Cleaning Method Frequency Supplies Needed Effectiveness Invisalign Cleaning Crystals Once daily Crystals, cup, water High Hydrogen Peroxide 1-2x weekly Peroxide, water, cup Medium White Vinegar 1-2x weekly Vinegar, water, cup Medium Mild Soap & Water Twice daily Soft brush, soap, water High Using a combination of daily clean brushing and periodic soaks in cleaning crystals or approved alternatives helps ensure your invisalign aligners remain clear and comfortable for the entire duration of your treatment plan. The Best Products and Tools: Invisalign Cleaning Crystals, Soaps, and More The market offers a variety of cleaning crystals and other solutions to help maintain your aligners. The official Invisalign cleaning crystals are easy to use, safe for your trays, and excellent at eliminating bacteria and stains. If you’re out of crystals, alternatives like hydrogen peroxide or white vinegar soaks can provide a deep clean, though they should not replace regular use of the crystals. Use mild, unscented soap when daily brushing, and always avoid harsh or scented soaps, mouthwash, and abrasive brushes, as these can damage or discolor your aligners. Invisalign cleaning crystals: pros, cons, and directions Cleaning crystals versus hydrogen peroxide and white vinegar When to use mild soap for cleaning Invisalign aligners What to avoid: scented soaps, mouthwash, harsh chemicals How to Use Invisalign Cleaning Crystals and Cleaning Crystal Alternatives To perform a deep clean, Invisalign cleaning crystals dissolve in warm water to create an effective soaking solution. This targets bacteria and prevents stains that may not budge with simple brushing. When you can’t access crystals, hydrogen peroxide diluted in water or a gentle white vinegar solution can be used as a backup, but always check with your orthodontist before trying new agents. Sodium sulfate, found in some over-the-counter cleaning tablets, is generally safe but never use harsh chemicals or bleach on your trays. Remember, regular soaking—combined with gentle brushing—ensures your invisalign tray stays invisible and healthy. Add one packet of Invisalign cleaning crystals to warm water Submerge your aligners and soak for recommended duration Rinse Invisalign aligners thoroughly before wearing Follow manufacturer directions closely for soak time, usually around 15–20 minutes. Always rinse aligners with warm water before putting them back into your mouth to remove any leftover cleaning solution. Below is a demonstration video showing step-by-step cleaning of Invisalign aligners , focusing on the correct techniques for rinsing, brushing with mild soap, and using Invisalign cleaning crystals . You'll hear expert orthodontic tips and essential cautionary advice to avoid damaging your trays. Video Demonstration: Invisalign Aligner Cleaning Steps Alternative Invisalign Cleaning Methods: Hydrogen Peroxide, White Vinegar, Distilled White Solutions If you can’t access Invisalign cleaning crystals , several alternative methods are both safe and effective with the right preparation. Diluted hydrogen peroxide solutions can be used weekly to kill bacteria, while a distilled white vinegar soak works well for removing mineral deposits. With any method, always dilute and rinse thoroughly to prevent aftertaste. Homemade cleaning solutions may not replace the effectiveness of crystals, but can serve in a pinch—especially if you’re focused on keeping aligners clean between deep cleans. Are Homemade Solutions Safe for Invisalign Cleaning? Homemade solutions, when diluted properly, are safe for occasional use on Invisalign trays . However, concentrated or undiluted solutions risk damaging the trays’ material, causing warping, cloudiness, or introducing harmful chemicals into your mouth. If you choose to use homemade cleaners, stick with mild recipes and always rinse your aligners thoroughly before wearing. Avoid coloured cleaning agents or anything containing bleach, alcohol, or abrasive substances, which will reduce the life and clarity of your Invisalign aligner. Mix equal parts hydrogen peroxide and water to soak aligners Prepare 1-part distilled white vinegar with 3 parts water for a gentle soak Rinse thoroughly to prevent aftertaste Pro Tips for Keeping Invisalign Aligner and Tray Clear and Odor-Free Brush and rinse after eating Clean Invisalign trays and aligners before bed Avoid hot water, which warps aligner shape Maintain oral hygiene for optimal results Stick to a daily clean by rinsing your trays each time you remove them. Even a quick brush with soft bristles and unscented soap makes a big difference. Flossing and brushing your teeth before reinserting aligners keeps trays from trapping food particles . And, as orthodontists note, maintaining oral hygiene is the best defense against cloudy, smelly aligners: "Daily cleaning is key. Even a quick rinse and brush can prevent 90% of aligner stains and bacteria." – Dr. Avery, Orthodontist People Also Ask: How Should I Clean My Invisalign Aligners? What's the best way to clean Invisalign aligners? Using Invisalign cleaning crystals is the most effective solution, but daily gentle brushing with mild unscented soap and lukewarm water also works well for maintaining cleanliness. How often should I clean Invisalign aligners? You should clean your Invisalign aligners thoroughly every morning and night, and rinse them after every meal or beverage other than water. What kills bacteria on Invisalign? Invisalign cleaning crystals, hydrogen peroxide, and white vinegar soaks effectively eliminate bacteria from Invisalign trays and aligners. How long do I leave my Invisalign in the cleaning crystals? Invisalign aligners should be soaked in cleaning crystals solution for 15-20 minutes, as recommended by manufacturers and orthodontists. Video Guide: Cleaning Your Invisalign Aligner at Home Watch a walkthrough of expert-approved cleaning routines, including how to brush, soak, and rinse your aligners using both official and alternative cleaning products. Following these steps keeps your Invisalign aligners comfortable and effective every day. Video Walkthrough: Invisalign Cleaning at Home Frequently Asked Questions: How Should I Clean My Invisalign Aligners? Can I use toothpaste to clean Invisalign trays? No. Toothpaste, especially whitening or abrasive types, can scratch or cloud your aligners. Stick with mild, unscented soap and approved cleaning crystals. Do I need a special Invisalign aligner brush? While a dedicated soft-bristle brush is helpful, any clean, soft toothbrush will work. Never use hard-bristled or electric brushes directly on the trays, as they can cause damage. What happens if I forget to clean my Invisalign aligners? Skipping your cleaning routine allows bacteria, food particles, and stains to accumulate, which can result in bad breath, visible cloudiness, or even dental health issues. Will mouthwash damage my Invisalign trays? Yes. Many types of mouthwash contain alcohol and dyes that can damage or discolor your aligners. Only rinse trays with water or safe cleaning solutions recommended by your orthodontist. Mistakes to Avoid: Protecting the Life of Your Invisalign Trays and Aligners Safeguard your Invisalign investment by avoiding the most common cleaning mistakes, which can shorten tray lifespan or make them less effective. Never expose your aligners to high temperatures, harsh chemicals, or abrasive cleaning methods. Never use hot or boiling water Avoid colored or scented soaps Do not use harsh toothpaste or abrasive brushes Keep Invisalign away from unapproved cleaners What to Do If Your Invisalign Trays Turn Cloudy or Smell Bad If your trays develop persistent cloudiness or odor, soak them in Invisalign cleaning crystals or a diluted hydrogen peroxide solution as soon as possible. Brush away any buildup with a soft brush and ensure your oral hygiene routine is on point. If odor or discoloration remains, consult your orthodontist for tray replacement or professional advice. Summary: Clear Steps for Clean Invisalign Aligners – Start Your Healthier Smile Today Clean Invisalign aligners routinely for clarity and hygiene Choose trusted cleaning methods and products Follow expert tips to keep Invisalign trays invisible and odor-free Take action today by upgrading your daily cleaning method—your smile will thank you! Stay Informed and Smile Bright Want more expert-backed answers about braces, Invisalign, and local orthodontic care? Subscribe to Grand Strand Smile Spotlight and stay ahead of your smile journey. To ensure your Invisalign aligners remain clean and effective, it’s essential to follow proper cleaning practices. The article “Invisalign Care Tips: Keep Your Aligners Clean and Clear” provides comprehensive guidance on daily cleaning routines, including the importance of rinsing aligners with lukewarm water and using a soft-bristled toothbrush with gentle liquid soap to prevent scratches and cloudiness. ( oxforddental.com ) Additionally, “How to Care for Your Invisalign Aligners: A Complete Guide” emphasizes the necessity of cleaning aligners at least once a day to prevent plaque buildup and maintain their clarity. ( smilearizona.net ) By incorporating these expert-recommended practices into your daily routine, you can keep your aligners fresh, clear, and effective throughout your treatment.

08.12.2025

How Should I Clean My Invisalign Aligners? Easy Steps

"Did you know? A 2023 survey revealed that over 65% of Invisalign users experienced unsightly stains or odors in their aligners due to improper cleaning. Mastering how to clean Invisalign aligners is essential for both your smile and your health." Keeping your Invisalign trays clear isn’t just about looks – it’s crucial for oral hygiene , fresh breath, and reaching your treatment goals faster. If you’re wondering how should I clean my Invisalign aligners to prevent yellowing, odors, or bacteria, you’re in the right place. This comprehensive guide breaks down the science behind aligner care, compares top cleaning methods (including crystals, white vinegar, and hydrogen peroxide), and reveals what to do, what to avoid, and how a stellar cleaning routine ensures a healthy, radiant smile. Let’s dive in so you can wear your aligners confidently—every day! How Should I Clean My Invisalign Aligners? Proven Cleaning Methods Explained Uncover the science behind cleaning your Invisalign aligners and why regular care is crucial for oral hygiene. Discover professional strategies for keeping your Invisalign aligners, trays, and retainers spotless and clear. Understand how improper cleaning can affect your Invisalign aligners, extend treatment times, and compromise oral hygiene. The question how should I clean my Invisalign aligners comes up often among users who want clear, odor-free trays that blend in seamlessly with their daily life. Invisalign trays are made from medical-grade thermoplastic, designed for clarity—but even the highest quality plastic is no match for plaque, food particles , and daily wear unless you keep them clean. Regular cleaning (not just a quick rinse!) prevents build-up of bacteria that could otherwise cause bad breath , tooth decay, and even slow your progress by trapping stains against your teeth. Adopting the right cleaning method helps protect your aligners and your smile. Below, learn exactly how to keep your Invisalign aligners clear, odorless, and working at their best. Unlock the Benefits: What You'll Master About How to Clean Invisalign Aligners Best daily practices for cleaning Invisalign aligners Methods and products: cleaning crystals , hydrogen peroxide , white vinegar , and more Common mistakes and what to avoid Impact of oral hygiene on treatment success Fundamental Cleaning Method: Step-by-Step Instructions for How Should I Clean My Invisalign Aligners Step 1: Rinse Your Aligners Importance of rinsing Invisalign trays after removal to prevent plaque and bacteria buildup. Practical tips for when and how to rinse your aligners. Each time you remove your Invisalign tray —to eat, drink, or brush—give it a thorough rinse with lukewarm (never hot) water . This step washes away any food particles , bacteria, and plaque, preventing buildup that can cause odors and stain your aligners . Holding your removable trays under a gentle stream for several seconds ensures that even hard-to-see areas are cleansed without warping the plastic. For travel or eating out, carry a small water bottle to rinse if you’re away from a sink. Remember, immediate rinsing after every removal is a gold standard in effective Invisalign cleaning! Step 2: Daily Clean — Brushing and Gentle Cleansers Correct brushing technique for cleaning invisalign aligners. Best soft-bristled brushes and recommended unscented soap products. For your daily clean , gently brush your Invisalign aligners with a soft-bristled toothbrush and a clear, unscented antibacterial soap—never toothpaste or harsh scrubs. Use circular motions and light pressure to clean inside and out, reaching all surfaces without scratching. Scented soap should be avoided, as it can leave lingering flavors and staining on your aligner . After brushing, rinse thoroughly with lukewarm water to remove soap residue. Maintain a separate toothbrush for your aligners clean , and don’t forget to brush your teeth before reinserting the trays, protecting both your oral hygiene and your devices from bacteria transfer. Daily cleaning keeps your aligners from turning cloudy and helps combat bad breath —a common issue when food particles or bacteria collect in Invisalign aligners . Pairing this cleaning routine with diligent dental hygiene greatly reduces the risk of tooth decay during Invisalign treatment. Remember, a quick routine each morning and night is the secret to a fresher mouth and crystal-clear trays . Step 3: Soak Your Aligners for Enhanced Invisalign Clean Comparing cleaning crystal, Invisalign cleaning crystals, and natural solutions like distilled white vinegar and hydrogen peroxide. How and when to use these methods. For a deeper clean and to dissolve tough build-up or stubborn stains, soak your aligners once daily in an approved solution. The most popular options include Invisalign cleaning crystals (containing sodium sulfate), a 1:1 mix of distilled white vinegar and warm water, or a diluted hydrogen peroxide solution (equal parts with water). Choose your favorite based on your needs—crystals are specifically designed for dental appliances and are highly effective, while white vinegar and hydrogen peroxide are powerful natural alternatives that fight germs and odors. Always follow product instructions and avoid soaking for too long, especially with vinegar or peroxide, to protect your aligners from damage or aftertastes. Here’s how to do it: Dissolve a cleaning crystal packet in enough water to fully cover your trays, and soak for 15–20 minutes. For vinegar or hydrogen peroxide, soak for about 15 minutes, rinse thoroughly, and allow to air-dry before reinserting. Remember, regular soaking makes your aligners noticeably fresher and crystal clear. Comparison Table: Cleaning Crystal vs. White Vinegar vs. Hydrogen Peroxide for Invisalign Cleaning Solution Effectiveness Cost Availability Odor Cleaning Crystal High (removes stains, bacteria, and odors) Medium ($$ per box) Online/Orthodontist Neutral White Vinegar Medium-High (good for odor & stain) Low ($ per bottle) Supermarket Vinegary scent dissipates Hydrogen Peroxide High (great for tough stains/bacteria) Low ($ per bottle) Supermarket/Pharmacy Low/no odor if rinsed Step 4: Final Rinse and Oral Hygiene How oral hygiene and rinsing complement your aligner cleaning routine. Cautions against using toothpaste, mouthwash, or scented soap on Invisalign trays. After every soak, give your aligners one last, thorough rinse under lukewarm water. This removes residual cleaning solution, vinegar, or peroxide, ensuring no taste or irritation enters your mouth. Never use toothpaste (which is abrasive), colored soap, or mouthwash; these can scratch, cloud, or discolor the trays. When your Invisalign tray is clean, always brush your teeth and floss before reinserting. This holistic practice keeps both your oral hygiene and your Invisalign aligner in ideal shape, preventing bacteria from rebounding as soon as you wear the trays again. Remember, a spotless, clear aligner is a sign of great dental habits. Pair your cleaning routine with consistent brushing and fluoride toothpaste (on your teeth, not the aligners!) to minimize risks of tooth decay and ensure your Invisalign treatment yields the best possible results. Expert Tips for Cleaning Invisalign Trays and Keeping Invisalign Aligners Clear How often to clean invisalign aligners, using cleaning crystals safely, and avoiding common mistakes (hot water and harsh abrasives) Best practices for storing your invisalign tray and maintaining stain-free invisalign aligners Clean your Invisalign trays thoroughly twice a day—more often if you snack frequently or notice buildup. When using cleaning crystals , always dissolve them fully and never mix products. Avoid hot water, which can warp your aligners , and skip harsh abrasives or colored soaps that can stain or scratch the plastic. For travel or busy schedules, keep a protective case handy and store trays wet (with a touch of cleaning solution or just water) until you can rinse and clean properly—never let them dry out. When not in use, store your aligners in their case to protect from dirt, pets, or accidental drops. Regularly check for cloudiness or lingering odors—these are cues that your cleaning routine needs a boost. Following these practices ensures low-risk, low-stress invisalign cleaning and helps you maintain clear, discreet aligners from start to finish. "An ounce of prevention is worth a pound of cure — Keeping your aligners clean can shorten treatment time and improve your smile outcome." — Dr. Lauren Watson, Grand Strand Orthodontics Understanding Invisalign Cleaning Crystals: Are They Worth It? What are Invisalign cleaning crystals and how do they work? Instructions for using cleaning crystal solutions with your aligners and trays Pros, cons, and alternative products for deep Invisalign cleaning Invisalign cleaning crystals are a proprietary blend of sodium sulfate, sodium carbonate, and other gentle cleansers designed specifically for clear dental appliances. Drop a packet into a bowl of lukewarm water, dissolve, then soak your Invisalign trays for 15–20 minutes daily. These crystals powerfully remove built-up plaque, odors, and stains—without harsh chemicals or strong flavors. The main advantages are convenience and effectiveness; they’re widely recommended by orthodontists for a reason. However, they cost more than natural alternatives and must be purchased through dental suppliers or online. If you’re concerned about preservatives or additives, white vinegar or hydrogen peroxide are cost-effective alternatives, though they may require more thorough rinsing. Summary Table: Available Invisalign Cleaning Products Product Type Effectiveness Ease of Use Price Range Invisalign Cleaning Crystals Commercial (crystals) Excellent Very Easy $$ White Vinegar Natural Good Easy $ Hydrogen Peroxide Natural Excellent Easy $ Other Soaking Solutions Commercial (tablets/soaks) Good-Excellent Easy $$ Cleaning Invisalign Aligners Naturally: White Vinegar and Hydrogen Peroxide Methods How to use distilled white vinegar safely for cleaning your invisalign aligners Advantages and disadvantages of hydrogen peroxide for invisalign cleaning Scented soap, gentle cleaning, and residue-free maintenance tips If you prefer natural cleaning, distilled white vinegar works wonders for dissolving stains and neutralizing odors. Mix equal parts vinegar and lukewarm water, soak your aligners for 15 minutes, then rinse thoroughly. Vinegar is gentle, widely available, and cost-effective—but shouldn’t be overused as prolonged exposure may weaken the plastic or leave a smell if not rinsed off properly. Hydrogen peroxide is another proven solution for deep cleaning, especially if you notice built-up residue, staining, or bad breath . Dilute with equal parts water, soak your trays, and brush softly after (but don’t forget a thorough rinse). It’s highly effective, but ensure you use food-grade 3% peroxide and never ingest any remaining solution. Both methods beat using abrasive toothpaste or harsh chemicals, and each leaves your aligners refreshingly clear when combined with regular rinsing and gentle brushing. Always stick to clear, unscented soaps if you go for a quick brush rather than a soak, and double-rinse to prevent soapy aftertastes. Remember, your cleaning method should be thorough, gentle, and repeated every day for best results throughout your Invisalign treatment . People Also Ask: The Top Invisalign Cleaning Questions Answered What is the best thing to clean your Invisalign with? The best thing to clean your Invisalign aligners with is Invisalign cleaning crystals, or a gentle anti-bacterial soap with a soft toothbrush. For deeper cleans, you can soak your aligners in a mixture of water and distilled white vinegar or hydrogen peroxide for short periods. How often should I clean Invisalign aligners? You should clean invisalign aligners at least twice a day and rinse them every time you remove them. Deep cleaning with a soak or cleaning crystals is recommended at least once daily. What is the 30 minute rule for Invisalign? The 30 minute rule refers to not leaving Invisalign trays out of your mouth for more than 30 minutes. Extended periods without trays can affect treatment progress and increase the risk of bacteria and staining on your aligners. Is it better to clean Invisalign with soap or toothpaste? Soap (preferably unscented and gentle) is safer for cleaning your invisalign aligners than toothpaste, which can be abrasive and cause scratches leading to cloudiness and trapping bacteria. Major Mistakes to Avoid: Protecting Your Invisalign Aligners and Oral Hygiene Why using toothpaste or harsh chemicals can ruin invisalign trays Avoiding colored or scented soap, and what happens if invisalign aligners dry out or are not cleaned properly Tips to maximize aligner life and maintain optimal oral hygiene throughout treatment Toothpaste might seem like a logical cleaning tool, but it’s actually too abrasive for Invisalign trays . Scratches on the surface make them cloudy and create crevices for bacteria to flourish, potentially leading to bad breath and higher risk of tooth decay . Similarly, products containing harsh chemicals, mouthwash with alcohol or color, and scented soap are not suitable—they can not only cause staining and off flavors, but also compromise the structural integrity of your invisalign aligner . Never allow your aligners to dry out: when left exposed to air, they can accumulate dust and bacteria, and may even become brittle or discolored. Always rinse after removal and store in a case moistened by a little water or a cleaning solution. Failing to keep your Invisalign tray clean impacts aligner life, prolongs treatment, and can seriously affect your oral hygiene . With the right approach, you'll keep your smile healthy throughout your Invisalign journey. To get the most from your aligners, adopt a cleaning schedule, stick to approved products, rinse often, and prioritize oral hygiene. Avoid shortcuts—proper care ensures invisible, odorless trays and maximizes both health and treatment results. Quick Reference: Cleaning Schedule for Invisalign Aligners and Trays Morning & evening: Rinse and brush invisalign aligners with gentle soap Once per day: Soak in cleaning crystal solution or white vinegar As needed: Rinse after meals or snacks and before reinsertion Printable Invisalign Cleaning Schedule — Track your cleaning routines for optimal oral hygiene Time of Day Cleaning Task Product/Method Notes Morning Rinse & brush Gentle, unscented soap Soft toothbrush Don’t use toothpaste Lunch/After Meals Rinse thoroughly Lukewarm water Store in case if not reinserting Evening Deep soak Cleaning crystals/ White vinegar/ Hydrogen peroxide Follow with thorough rinse Bedtime Rinse & brush again Gentle soap, water Brush teeth before reinserting trays FAQs on How Should I Clean My Invisalign Aligners and Invisalign Cleaning Crystals Can I use regular denture cleaners for Invisalign aligners? It's best to use products specifically designed for clear aligners; many denture cleaners contain ingredients that can discolor or weaken Invisalign trays. Stick to cleaning crystals or the recommended natural soaks. Are cleaning crystals safe for daily use on aligners and retainers? Yes, cleaning crystals are formulated for regular use and are safe when used as directed. Avoid using more than instructed or mixing with other chemicals. How can I remove persistent stains from Invisalign trays? For stubborn stains, soak your aligners in hydrogen peroxide or white vinegar solution and brush gently with a soft brush. Consistency with daily cleaning prevents most stains from forming. What should I do if my aligners start to smell or taste bad? If you notice odors, increase the frequency of your cleaning routine, soak in crystals or natural solutions, and ensure you are rinsing thoroughly after each meal or snack before reinsertion. Essential Takeaways: How Should I Clean My Invisalign Aligners? Stick to daily maintenance and deep cleaning routines Choose the right products: cleaning crystals, gentle soap, white vinegar Avoid harsh chemicals, hot water, and colored substances Proper care ensures a beautiful smile and healthier oral hygiene For a Cleaner, Healthier Smile: Stay Informed and Improve Your Invisalign Experience Subscribe now to get the latest Grand Strand orthodontic guides, tips, and updates — right to your inbox. No spam. Just smiles. Maintaining the cleanliness of your Invisalign aligners is crucial for both oral hygiene and the effectiveness of your treatment. To ensure your aligners remain clear and free from bacteria, it’s essential to follow a consistent cleaning routine. Daily Cleaning Routine: Rinse Upon Removal: Each time you remove your aligners, rinse them under lukewarm water to eliminate saliva and debris. Avoid using hot water, as it can warp the plastic. ( oliveorthodontics.com ) Gentle Brushing: Use a soft-bristled toothbrush dedicated to your aligners. Apply a small amount of clear, unscented antibacterial soap and gently brush all surfaces. Refrain from using toothpaste, which can be abrasive and cause scratches. ( healthline.com ) Daily Soaking: For a deeper clean, soak your aligners daily in a solution like Invisalign Cleaning Crystals or a mixture of equal parts white vinegar and warm water for 15–20 minutes. This helps remove stubborn buildup and bacteria. ( oliveorthodontics.com ) Rinse Before Reinsertion: After soaking, rinse your aligners thoroughly with lukewarm water to remove any residual cleaning solution. Additional Tips: Avoid Eating or Drinking with Aligners: Except for water, remove your aligners before consuming food or beverages to prevent staining and damage. ( oliveorthodontics.com ) Proper Storage: When not in use, store your aligners in their protective case to shield them from bacteria and potential damage. ( paloaltoorthodontics.com ) Maintain Oral Hygiene: Brush and floss your teeth before reinserting your aligners to prevent trapping food particles and bacteria. ( healthline.com ) By adhering to these practices, you can keep your Invisalign aligners clean, clear, and effective throughout your treatment.

08.07.2025

What Happens If a Bracket or Wire Breaks? Quick Fixes

Curious what to do if your braces break unexpectedly? Whether it’s a broken bracket , a loose wire , or you’re just worried about treatment delays, you’re not alone. Did you know that quick, informed action can save your smile and keep your orthodontic journey on track? This detailed guide walks you through exactly what happens if a bracket or wire breaks, offering simple steps, professional advice, and the confidence to manage a braces mishap. Ever Wondered What Happens If a Bracket or Wire Breaks? Essential Facts and Next Steps Encountering a broken bracket or wire during orthodontic treatment can be surprising and stressful, but knowing what happens if a bracket or wire breaks prepares you for the right response. Braces are durable, but daily life—especially biting into hard foods or a surprise bump to the mouth—may sometimes result in broken braces , broken wires , or a loose wire . It's common for people wearing braces to worry about how this will impact their treatment progress and whether a repair is urgent. If you notice discomfort, a shift in your brackets and wires, or a poking wire, responding quickly helps prevent further damage. Knowing how to handle a broken bracket or wire ensures a smoother orthodontic journey and minimizes the risk of delaying your results. In the following sections, you’ll learn the top causes, instant fixes using orthodontic wax , and when to contact your orthodontist so your smile stays on track. Unlocking the Reasons: Why a Bracket or Wire Breaks During Orthodontic Treatment Biting hard foods: Crunchy snacks or sticky candies can snap a wire or dislodge a bracket. Trauma: Accidental blows to the mouth, whether during sports or falls, are a leading cause of broken braces . Oral hygiene challenges: Improper brushing or flossing techniques may weaken the adhesive, causing brackets to come loose over time. Simple changes—like avoiding caramel, popcorn, and nuts—can prevent a bracket or wire break . Good oral hygiene habits not only keep teeth healthy but also help maintain the security of all brackets and wires. Remember, prevention is easier than repair. "A broken bracket or wire doesn't have to be a setback if you know how to handle it—prompt, informed action ensures steady treatment progress." — Dr. Jane Orthosmile Understanding the Impact: What Happens If a Bracket or Wire Breaks During Braces Treatment When a bracket or wire breaks , the consequences can vary. A broken wire or loose wire may cause discomfort, irritation, or even injury if the sharp end pokes your cheek or gum. More importantly, a broken bracket can delay your treatment progress, causing your teeth to shift less efficiently or even revert to their former position. It's not only discomfort that’s at stake— broken braces disrupt the delicate force that moves your teeth, and the longer you wait, the more chance there is for setbacks. Immediate action, as detailed in the upcoming sections, will help you maintain your treatment on track and minimize the inconvenience. Potential Effects on Your Orthodontic Treatment Progress Delays in tooth movement: If a bracket or wire is compromised, the planned pressure on your teeth weakens or stops, slowing progress. Discomfort or mouth irritation: Broken wires can poke sensitive tissues, causing sore spots or small injuries in the mouth. Need for a repair appointment: Most cases will require a scheduled visit for professional repair or adjustment, leading to additional appointments. Don't ignore discomfort or visible issues—these can escalate if left untreated. Quick action keeps your treatment moving and your mouth healthy. How Broken Braces Can Influence Oral Hygiene and Risk of Dental Problems Difficulty brushing and flossing: Damaged brackets and wires complicate oral hygiene, making it harder to clean your teeth and braces thoroughly. Increased risk of plaque buildup and gingivitis: With loose wires or a broken bracket , you may miss spots, allowing plaque and bacteria to accumulate around the break, risking decay and gum issues. Prioritizing oral hygiene after experiencing an orthodontic mishap helps prevent further dental problems. Special tools like an interdental brush or a cotton swab can help you navigate around sharp edges until your repair appointment. Quick Fixes for Broken Brackets or Wires: Step-by-Step Guidance Knowing what happens if a bracket or wire breaks is important—but knowing how to respond is crucial. Here’s your step-by-step guide for quick, safe action when broken braces strike. Immediate Actions When You Experience a Broken Bracket or Wire Inspect the break: Use a mirror and clean hands to check if it’s a loose wire , a sharp end , or a broken bracket . Assess discomfort: Note any irritation, swelling, or sore spots—these tell you how urgent the issue is. Avoid aggravating foods: Stick to soft foods and avoid anything hard, sticky, or crunchy to prevent further damage. The key is not to panic . Most bracket or wire breaks aren’t emergencies, and effective temporary solutions are available. DIY Temporary Solutions: Orthodontic Wax and Home Remedies Applying orthodontic wax: Roll a small piece and firmly cover the sharp edge or protruding wire for instant comfort. Using clean tweezers: If a wire is out of place, gently reposition it away from your gum or cheek, being careful not to bend or snap it further. Rinsing with saltwater: This eases irritation and promotes healing in sensitive spots created by broken wires . Leave it alone: If the break is minor and painless, you can wait for your repair appointment without making adjustments. Orthodontic wax is your first line of defense. If that's not enough, a small piece of clean cotton or a cotton swab can cushion sharp edges temporarily. Avoid self-repair beyond these steps—never use nail clippers or glue, as it could seriously worsen the problem. "Orthodontic wax is your first defense for a protruding wire or loose bracket. It can make the wait for a repair appointment far more comfortable." — American Association of Orthodontists When to Contact Your Orthodontist After a Broken Bracket or Wire Signs of an emergency: If a wire is deeply embedded, bleeding persists, or severe pain occurs, seek immediate attention. Persistent pain: If discomfort lasts beyond a day or cannot be managed with wax, call your orthodontist. Broken wire or bracket causing injury: Any injury or ulcer forming in the mouth or difficulty closing your mouth signal an urgent need for a professional look. When in doubt, contact your orthodontist to schedule an appointment . Prompt intervention ensures your treatment stays on track and lowers your risk of additional problems. Broken Brackets vs. Broken Wires: Differences in Treatment and Response Aspect Broken Bracket Broken Wire Symptoms Loose, spinning, or missing bracket; discomfort Wire poking out; sharp end; possible loose wire Risks Slowed/altered tooth movement; potential for further detachment Injury to cheek or gums; shifting of teeth Immediate Actions Apply wax; keep clean; avoid hard foods Apply wax; use tweezers to reposition; rinse with saltwater Repair Process Bracket cleaned and re-bonded by orthodontist Wire trimmed, replaced, or adjusted at orthodontic office How a Broken Bracket or Wire Affects Your Orthodontic Treatment Progress Every bracket or wire break has the potential to impact your overall treatment progress . Since braces work by applying gentle, steady pressure, any disruption—whether it’s a broken bracket , broken wire , or a loose wire —can halt or revert months of progress if not swiftly managed. Consequences of Delayed Repairs and Prolonged Wire Breaks Extended treatment timeline: Missing pressure means your teeth may stop moving or drift backward, lengthening your entire orthodontic journey. Possible shifting back of teeth: Teeth can begin to return to their old positions, which is why schedule an appointment quickly is so important. Discomfort: The longer a sharp end or broken wire is left, the greater your risk for soreness or cuts in your mouth. Timely professional action keeps your treatment on track and minimizes complications from a broken brace or wire break. Repair Appointment Essentials: What to Expect Examination: Your orthodontist will inspect all brackets and wires to pinpoint the issue. Repair or replacement: Broken brackets are typically re-bonded or replaced, while wires are trimmed or swapped out as needed. Treatment plan adjustment: In some cases, your orthodontist may need to modify your future wire adjustments to account for time lost, ensuring your treatment progress remains efficient. Arrive prepared with details about your break, and ask questions so you understand how the plan will keep your smile moving forward. Practical Prevention: How to Avoid a Broken Bracket or Wire Taking control of your daily habits and diet is the best strategy to prevent an annoying bracket or wire break . Here’s how to protect your braces and your smile. Smart Habits and Foods to Prevent Broken Braces Foods to avoid: Skip popcorn, hard candies, ice cubes, and chewing gum, which are leading causes of broken brackets and loose wires. Proper cleaning techniques: Use a soft-bristled brush and gentle, circular motions. Watch for loose wires while flossing to prevent pulling or bending. Compliance with orthodontic care instructions: Always use a mouthguard during sports, and follow your orthodontist’s directions on what to eat and how to clean your teeth and braces . Staying consistent with these practices not only lowers your risk for a wire break but also keeps your treatment progress on schedule. Maintaining Excellent Oral Hygiene During Braces to Prevent Breakage Brushing and flossing tips: Brush after every meal using a fluoride toothpaste and pay extra attention around the brackets and under the wires. Floss with a threader, water flosser, or interdental brush. Recommended dental products: Ask your orthodontist about wax, silicone covers, and special brushes designed for people wearing braces. Routine dental checkups: Regular professional cleanings help spot and fix potential problems before they cause a broken brace . Excellent oral hygiene is your first defense against many mouth problems and reduces your risk for bracket or wire mishaps. People Also Ask: Common Questions About Broken Brackets and Wires What happens if the wire on your braces breaks? When the wire breaks , it may have a sharp end that pokes or irritates your cheek or gums. Applying orthodontic wax over the end and gently repositioning it with clean tweezers provides temporary relief. It’s important to contact your orthodontist as soon as possible to properly repair the wire and avoid complications. Can your teeth still move with a broken bracket? If your bracket breaks , tooth movement is often slowed or halted at the affected spot. The bracket needs to be securely reattached for consistent, effective pressure. Delay in fixing a broken bracket will likely prolong your treatment progress . Is a broken bracket an emergency? While a broken bracket typically isn’t a dental emergency, it should be addressed promptly. If ignored, it can extend the overall time you wear braces and may lead to additional problems, especially if discomfort or injury occurs. What happens if the wire comes out of the bracket? A wire that’s slipped out can cause discomfort or even injury if not handled carefully. Use clean tweezers to attempt to guide the wire back into place, and cover the sharp end with wax. If discomfort continues, schedule a repair appointment as soon as possible. Watch this short visual guide for step-by-step solutions to quickly manage a broken bracket or wire, ensuring you minimize the risk of further damage. (Video embed or link placed here.) Orthodontic experts explain the do’s and don’ts after a wire break or broken bracket , so you know exactly how to respond and when to call your orthodontist. (Video embed or link placed here.) Expert Guidance: Frequently Asked Questions on Broken Brackets and Wire Breaks Can you eat with a broken bracket or wire? If you have a broken bracket or wire , stick to soft foods to avoid further problems. Avoid sticky or hard foods that might aggravate the issue. Following this guidance keeps you comfortable until your repair appointment. How soon should you visit the orthodontist after damage? Aim to see your orthodontist within a few days of the break—even sooner if you experience a sharp end , injury, or severe pain. The faster you get a repair, the less you risk delaying your treatment progress . Should you try to fix a wire or bracket yourself? Temporary fixes such as applying orthodontic wax or gentle repositioning with clean tweezers are safe. Never try to glue a bracket or cut a wire yourself—improper repairs could lead to more significant problems. Key Steps and Takeaways: Staying on Track With Your Orthodontic Treatment Inspect promptly after a break occurs. Use safe temporary solutions like wax and gentle positioning. Schedule repairs quickly to prevent treatment delays. Maintain excellent oral hygiene throughout your treatment. Avoid risky behaviors and foods that could cause another wire or bracket break. Ready for Confident Smiles? Stay Informed About Broken Bracket or Wire Solutions "Being proactive after a bracket or wire breaks keeps your orthodontic treatment on course and your smile healthy." — Dr. Alex Grin Subscribe for More Orthodontic Treatment Tips and Updates Subscribe now to get the latest Grand Strand orthodontic guides, tips, and updates — right to your inbox. No spam. Just smiles. Take charge of your smile! Respond quickly to any bracket or wire break, use temporary fixes, and schedule a repair with your orthodontist to keep your treatment on track. Experiencing a broken bracket or wire during orthodontic treatment can be concerning, but understanding the appropriate steps to take can help you manage the situation effectively. Immediate Actions: Assess the Damage: Examine your braces to identify the issue, whether it’s a loose bracket or a protruding wire. Protect Your Mouth: If a wire is causing discomfort, use orthodontic wax to cover any sharp edges. This will help prevent irritation to your cheeks or gums. ( colgate.com ) Avoid Aggravating Foods: Stick to soft foods and avoid hard, crunchy, or sticky items that could exacerbate the problem. ( theorthodontists.com.au ) Temporary Solutions: For a Loose Bracket: If the bracket is still attached to the wire but has come off the tooth, you can gently slide it back into position using sterilized tweezers. Apply orthodontic wax to hold it in place until you can see your orthodontist. ( colgate.com ) For a Protruding Wire: If a wire is sticking out and causing discomfort, you can attempt to gently push it back into place using a cotton swab or the eraser end of a pencil. If that’s not possible, cover the end with orthodontic wax to prevent irritation. ( theorthodontists.com.au ) When to Contact Your Orthodontist: While these temporary measures can provide relief, it’s essential to schedule an appointment with your orthodontist promptly to repair the damage and ensure your treatment stays on track. ( colgate.com ) By taking these steps, you can manage a broken bracket or wire effectively and minimize any disruption to your orthodontic treatment.

Terms of Service

Privacy Policy

Core Modal Title

Sorry, no results found

You Might Find These Articles Interesting

T
Please Check Your Email
We Will Be Following Up Shortly
*
*
*